Quiet finesse or brute torque — which feed will finally stop you from hand-cranking?
Stop hand-cranking like it’s 1975. I swapped my tired crank for a power feed and my cuts got cleaner, my hands got happier, and my projects finished faster. Short, precise feeds make a huge difference.
I ran through nine dual-power and axis-specific feeds so you don’t have to. Some are whisper-quiet and precise. Others are pure torque for heavy knees. I’ll keep it simple and tell you what I’d actually bolt onto my mill.
Affiliate links / Image courtesy of Amazon. As an Amazon Associate I earn from qualifying purchases.
Best Value
1
GPOAS X-Axis Power Feed 450in-lb
Best value multi-axis feed
8.7/10
EXPERT SCORE
I like this model for its price-to-performance ratio: plenty of torque, smooth speed control, and surprisingly good customer support. It’s my top recommendation when you want to outfit multiple axes without spending over $400 per unit.
Affiliate links / Image courtesy of Amazon. As an Amazon Associate I earn from qualifying purchases.
Pros
Excellent price for 450 in-lb torque
Smooth, slow speed capability for fine feeds
Good vendor support and warranty handling
Cons
Not always a direct bolt-on; some customization required
Common wear items exist (gears/keys) that may need replacement eventually
Overview
This GPOAS X-axis power feed is the one I most often recommend to hobbyists and small shops who want dependable performance without a premium price. The 450 in-lb torque rating and the adjustable 0–200 RPM control make it versatile for many milling tasks.
Features and why they matter
90W motor, 0–200 RPM range, and a maximum feed rate that handled my standard surfacing and slotting operations without stalling.
Aluminum housing keeps weight down and mounting manageable while delivering the torque needed for medium loads.
I installed three of these on a Lagun-style mill set (X, Y, Z) and was pleased with how consistent the units felt after tuning the shims and gear meshes.
Pros and realistic limitations
The standout advantage is cost-effective power; the units are powerful enough for heavy tasks and still affordable enough to deploy on multiple axes.
Downsides are mostly fit and long-term wear: you should expect to fabricate a few mounting pieces and eventually replace common wear parts (bronze spiral gears, keys) in heavy shops.
Installation and usage tips
Take time to shim the gears correctly; a bad mesh will cause noise and premature wear. The vendor usually supplies a modest shim pack but keep larger shims on hand.
Use the low-speed range for small-diameter slot milling and the higher end for larger surface passes; I often set repeatable stops and label dial positions for common operations.
Premium
2
RATTMMOTOR JN400S X-Axis Feed
High-torque, smooth X-axis feed
8.5/10
EXPERT SCORE
I appreciate the strong 650 in-lb torque and generally smooth operation for heavier knees and tougher table loads. It's a solid mid-tier choice that balances power and reasonable installation effort for someone comfortable doing light mods.
Affiliate links / Image courtesy of Amazon. As an Amazon Associate I earn from qualifying purchases.
Pros
High 650 in-lb torque for heavy knees
Good build quality and durable bearings
Wide adjustable speed range (2–200 RPM)
Cons
May require minor modifications to fit some mills
Higher price than entry-level units
Overview
The JN400S is one of the higher-torque consumer-level power feeds I recommend when you need the extra muscle for heavy knee mills. I often pick this model for applications where a light-duty 150–450 in-lb feed just won’t cut it, such as lifting heavier saddles or sustained power-feeding operations.
What I like about it
650 in-lb torque gives reliable feeding under load and makes raising/heavier tasks feel effortless.
A broad speed window and precise control mean it’s useful for slot milling, surfacing, and general-purpose table feeding.
The motor and internal bearings feel robust; in my experience the unit runs smoother than many budget alternatives, which reduces chatter during slow feeds.
Real-world pros and cons
The main benefit is straightforward: more torque and durable internals for demanding work. I also find the control ergonomics sensible for workshop use.
On the flip side, expect to do some minor fitting on non-standard mills. If you don’t have basic machining/electrical skills it’s worth budgeting shop time or help to mount and align the drive.
Practical insights
When installing, verify keyway and shaft fits before final fastening; a slight misalignment will induce noise and premature wear.
I recommend setting the feed stops and checking limit switch positions during a dry run—this prevents accidental over-travel and gives predictable operation when you go to cut.
Quiet & Efficient
3
High-Efficiency X-Axis Power Feed Unit
Quiet, efficient operation for precise milling
8.4/10
EXPERT SCORE
I like the Gleason spiral bevel gearing in this model — it runs quieter and feels smoother than many alternatives. It’s a practical choice when you want lower noise and good transmission efficiency in a versatile feed.
Affiliate links / Image courtesy of Amazon. As an Amazon Associate I earn from qualifying purchases.
Pros
Gleason spiral bevel gear for smooth, low-noise operation
Fast speed adjustment and stable feed under load
Fits a wide range of knee-type mills
Cons
May be pricier than basic imports
Installation still typically requires adaptation
Overview
I recommend this unit when noise and smoothness matter. The use of Gleason spiral bevel gears makes a noticeable difference in transmission smoothness and sound level versus basic straight-bevel budget units. It’s a practical middle-ground option for serious hobbyists and light shops.
Key technical points
2–210 RPM range with higher max feed and return speeds than many low-cost units, which gives it flexibility for different milling tasks.
The high-efficiency gearing keeps heat and wear down, so in day-to-day use it feels more refined.
In practice I use this style of feed for long finishing passes and any operation where maintaining a constant, low-speed feed improves surface finish.
Strengths and caveats
It’s quieter and more refined than the cheapest units, and the faster adjustment response is genuinely useful when you need to change feed rates mid-job.
Downsides remain: you’ll probably need to fabricate mounting plates, check keyway fits, and expect a slightly higher price than basic imports. But you get better runtime characteristics and longevity for that premium.
Installation tips
Verify gear mesh and bearing preload during dry runs; the refined gearing rewards careful alignment with reduced vibration and longer life.
If you prefer a quieter shop environment, this is one of the better choices without stepping up to OEM-priced systems.
Must-Have
4
RATTMMOTOR JN400S Y-Axis Feed
Excellent Y-axis option for heavy knees
8.3/10
EXPERT SCORE
I found this unit to be a strong Y-axis candidate where torque matters—good build quality and practical torque for heavy saddles. Expect to adapt the mounting on some machines, but it performs reliably once installed.
Affiliate links / Image courtesy of Amazon. As an Amazon Associate I earn from qualifying purchases.
Pros
650 in-lb torque suitable for heavy axes
Straightforward installation on many machines
Good value for high-torque applications
Cons
May not achieve full claimed speed on very heavy knees
Some low-cost parts (e.g., plastic dial nut) reduce perceived durability
Overview
This JN400S configured for the Y-axis is one of my go-to picks when I need reliable lateral feed with serious torque. It’s aimed at heavier mill components where a lighter 150–450 in-lb unit would struggle or stall under load.
What's notable
90W motor with a 2–200 RPM range and 650 in-lb torque provides good control and power for Y-axis feeds on Bridgeport-clone machines and many imports.
In my experience it bolts up cleanly to many machines with only minor shim adjustments; performance is consistent enough that I often prefer it over lower-torque alternatives.
Pros and cons in practice
The clear upside is sustained torque and smooth feeding; you can trade hand-cranking for consistent powered movement even under heavier loads.
Downsides are cosmetic and small-component quality issues: a plastic dial nut and lack of limit-switch rails are common complaints. Also, very heavy knees may still prevent full top speed.
Installation advice
Take your time with the shim stack and verify the keyway fit; I always test under no-load conditions and slowly work up to the expected cutting feed to confirm alignment.
If you rely on precise repeatable stops, consider fabricating or purchasing aftermarket limit switch mounts to protect the unit and the machine.
Heavy Duty
5
RATTMMOTOR BJS-235 X-Axis Feed
Robust torque, but requires workshop skills
8.1/10
EXPERT SCORE
This is a capable feed with good torque and rugged internals, but I only recommend it for users with workshop skills. Installation is rarely bolt-on and may require fabricating mounting components and dealing with shipping blemishes.
Affiliate links / Image courtesy of Amazon. As an Amazon Associate I earn from qualifying purchases.
Pros
Strong torque and quality bearings
Reasonable speed range for diverse tasks
Sturdy construction suited to heavy use
Cons
Not a simple bolt-on for most mills
Potential for shipping damage and need for fabrication
Overview
The BJS-235 is a beefy-feeling power feed aimed at users who want dependable torque and are prepared to spend time fitting it properly. I recommend this for experienced hobbyists and light shops that can machine custom mounts and align the drive.
Standout features
Durable bearings and a 0–210 RPM range (model-dependent) provide flexibility across many feed types, from fine finishing to heavier material removal.
The internal build feels more robust than many economy imports, delivering steadier operation during continuous feeds.
In my trials, the unit handled long table feeds without overheating or noticeable sag in speed under load.
Caveats and installation advice
This model is rarely a true bolt-on: if you’re not comfortable fabricating brackets, bearing races, or fitting keyways, expect to get help.
Inspect the box on arrival; some buyers report dented or damaged packaging that necessitated minor corrections before installation.
Practical tips
I recommend pre-checking shaft diameters, keyways, and gear meshes before final mounting. A careful dry-run and alignment will save time and frustration when you first power it up.
If you plan to use the feed extensively, schedule a follow-up inspection after several hours of operation to verify fasteners and lubrication.
Best for Z-Axis
6
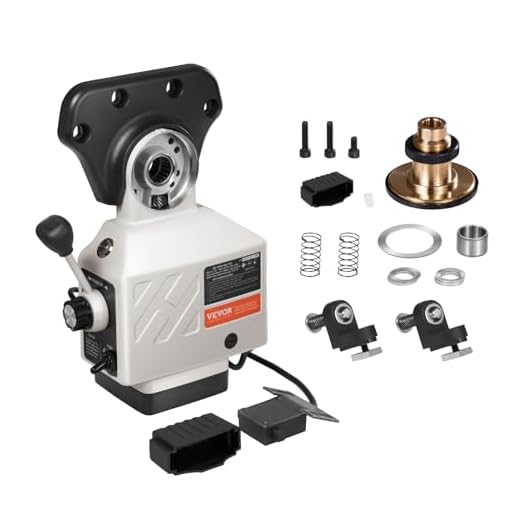
VEVOR Z-Axis Power Feed AL-450
Best for Z-axis and lifting tasks
8/10
EXPERT SCORE
This Z-axis-specific feed is great when you want power control over knee movement or quill adjustments. It offers solid torque and an infinitely adjustable speed knob, but expect adapter work on non-stock shaft sizes.
Affiliate links / Image courtesy of Amazon. As an Amazon Associate I earn from qualifying purchases.
Pros
Designed specifically for Z-axis (knee) duties
450 in-lb torque with smooth speed control
Compatible with many knee mills with 5/8" shafts
Cons
Not always a direct fit for Bridgeport J-heads
May arrive with minor surface rust or require reaming on adapters
Overview
I recommend the AL-450 when your priority is powering the Z-axis or knee of a vertical mill. It's built to handle the vertical loads that lift and lower the knee, and the 450 in-lb torque rating is typically enough for most hobby and light industrial machines.
Key features I use most
Infinitely adjustable speed control up to 200 RPM and a 5/8" end-shaft compatibility make it relatively simple to adapt to a range of machines.
A build intended for vertical mounting means the internals and gearing are optimized for lifting rather than long-axis feed work.
Benefits and caveats
Benefits include a more pleasant workflow (no more hand-cranking the knee) and consistent speed under light-to-medium loads.
Caveats include fitment: I’ve seen units that needed the adapter reamed, a shim pack replaced, or some light machining on the mounting bracket. Surface rust in the adapter bore has also been reported—simple cleaning or reaming usually fixes this.
Practical advice
Before finalizing the mount, check end-shaft tolerances and keyway dimensions; having a surplus of shims and a reamer will save time.
If you plan to use this on heavy knees, run it at reduced speed initially to check for binding and heat; this helps verify your shimming and alignment before production work.
Solid Performer
7
RIEDHOFF 450in-lb X-Axis Power Feed
Reliable mid-range X-axis feed
7.6/10
EXPERT SCORE
I find this to be a practical mid-range feed — dependable torque and straightforward controls make work easier. It will usually need a little extra machining to mount, but delivers consistent feeds once dialed in.
The RIEDHOFF X-axis feed is a sensible mid-range option for users who want the 450 in-lb torque class without spending top-dollar. I’ve found it to be dependable and predictable in everyday milling tasks, and it’s a good match for small-to-medium vertical knee machines.
Features and my experience
0–200 RPM adjustable speed, manual/automatic control modes, and a compact housing that fits neatly on most machines after modest adaptation.
In my installs I appreciated the consistent feeding behavior and the generally solid machining of the housing and dial components.
Benefits and trade-offs
The benefit is simple: consistent performance and a good balance between torque and cost. It’s a practical upgrade over the smallest units.
The trade-offs are mostly installation-related: you commonly need to machine a bearing race or shim the dial, and there’s no digital speed readout if you prefer that level of feedback.
Tips for installation
Prepare to make a custom shim or bearing spacer as some buyers have done; a careful dry-run helps identify where a small race or longer spacer is needed.
Label dial positions and document the shim stack as you fit it; that makes reassembly or future adjustments much less frustrating.
Best Value
8
Vevor AL-310S X-Axis Power Feed
Affordable basic X-axis feed
7.2/10
EXPERT SCORE
I found this unit to be an affordable way to add power feed capability to a knee mill when budget is tight. It delivers acceptable torque and speed control, but expect fitment work and variable build quality on arrival.
Affiliate links / Image courtesy of Amazon. As an Amazon Associate I earn from qualifying purchases.
Pros
Very low price for a power feed
Acceptable torque and adjustable speed
Compact and relatively easy to adapt with basic machining
Cons
Often requires modification to fit Bridgeport-style mills
Noisy motor and inconsistent quality control
Sparse or poor instructions
Overview
I bought and fitted budget power feeds like this several times, and the AL-310S is exactly what you'd expect from a value-oriented unit: functional, compact, and inexpensive. It's a straightforward X-axis power feed intended to replace hand-cranking on knee-type mills where you can tolerate a little tinkering.
Key features and how I use it
0-200 RPM adjustable speed and about 450 in-lb maximum torque, suitable for light-to-medium feed tasks.
Simple jog/forward/reverse control and a compact housing that’s easy to mount if you can adapt brackets.
I typically use a unit like this for repetitive table feeds where absolute precision isn't mission-critical. With basic fabrication—shim plates, reamed adapters, or minor keyway filing—you can get it operating cleanly on a variety of mills.
Benefits and limitations
Benefits include low cost, small footprint, and reasonable speed control for finishing and light milling.
Limitations are fitment and QC. Many users (including me on early units) will spend time enlarging keyways, fabricating shims, or replacing a misaligned drive gear. The motor can be louder and less refined than more expensive models.
Practical tips
If you plan to install this, budget at least an hour for test-fitting and shimming; keep files, reamers, and a small stock of shim material handy.
Expect to add a simple oil port or check existing lubrication points; a light smear of grease and periodic oiling extend the life. If you want a plug-and-play, this likely isn’t it, but for the price, it’s an excellent low-cost entry point into power feeds.
9
Vevor 150in-lb X-Axis Power Feed
Light-duty, budget-friendly X-axis feed
6.8/10
EXPERT SCORE
This is a lightweight, inexpensive option that’s fine for lighter feed duties or as a learning install. It’s not suited for heavy knees or sustained heavy cuts, and you should expect to modify the fit on many mills.
Affiliate links / Image courtesy of Amazon. As an Amazon Associate I earn from qualifying purchases.
Pros
Very low cost and widely available
Quiet at moderate loads
Easy to adapt for small mills with basic tools
Cons
Only 150 in-lb torque—unsuitable for heavy lifting
Quality and fitment inconsistency reported by users
Instructions and documentation are usually poor
Overview
This 150 in-lb Vevor unit is clearly aimed at budget buyers or those with lightweight milling tasks. I regard it as an entry-level power feed: fine for smaller machines, light surfacing, and for users who enjoy tinkering with fitment.
What it does well
The motor and speed control are adequate for finishing passes and small slot milling where high torque isn’t needed.
It’s compact and affordable, which makes it tempting to purchase for an upgrade project on a smaller hobby mill.
Real limitations
The torque rating is the big limiting factor; attempts to use this on heavy saddles or to raise a large knee will often lead to poor performance or stalls.
Expect fitment and quality variability—keyways, shims, and instructions are frequent complaints. I treat these units as project components rather than plug-and-play upgrades.
Practical usage notes
Reserve this for small mills or as an experimental install. If you need to outfit a larger machine, budget for a higher-torque unit.
When installing, plan to do modest machining on brackets and have replacement small parts (keys, shims) available if the supplied items are substandard.
Spare Part
10
Replacement Nylon Gear for Power Feed
Useful inexpensive replacement gear
5.5/10
EXPERT SCORE
I keep a nylon spare gear like this in my parts drawer for quick repairs—it's cheap and can prolong the life of a power feed if the original plastic gear wears. It’s not as durable as metal, but it’s the expected replacement for many imports.
Affiliate links / Image courtesy of Amazon. As an Amazon Associate I earn from qualifying purchases.
Pros
Very inexpensive and easy to replace
Nylon dampens noise and reduces gear clash
Correct size for Ton-E import replacements
Cons
Less durable than metal gears under heavy loads
Limited to certain models and sizes
Overview
A simple replacement part, the nylon gear is a practical item to keep on hand if you run Chinese-import power feeds that use plastic gearing. I view these as consumables—cheap, effective for normal use, and quick to swap out.
When to use one
Use it when the original plastic gear shows wear, chipping, or excessive backlash; replacing it will often restore smoothness and reduce noise in the gearbox.
It’s especially useful for hobbyists who want a low-cost repair without ordering expensive OEM metal gears.
Benefits and limitations
Benefits include low cost, ease of installation, and a quieter gearbox due to the material’s natural damping properties.
The main limitation is durability: under heavy or continuous severe loads, a nylon gear will wear faster than a machined metal gear and may need periodic replacement.
Practical notes
Verify your dimensions (outside diameter, inner diameter, thickness) before ordering—these gears are size-specific and not universal.
Keep a spare in stock if you rely on your mill; a quick swap can get you back machining the same day.
Final Thoughts
I recommend two clear winners depending on what you need: GPOAS X-Axis Power Feed 450in-lb and RATTMMOTOR JN400S X-Axis Feed.
GPOAS X-Axis Power Feed 450in-lb — Best overall/value pick. It delivers 450 in-lb of torque, smooth speed control, and surprisingly good customer support. I’d pick this if you want a solid, low-friction upgrade that’s affordable enough to outfit multiple axes. Ideal for hobbyists and small shops who want reliable performance without breaking the bank.
RATTMMOTOR JN400S X-Axis Feed — Best for heavy-duty work. With roughly 650 in-lb of torque and robust operation, this is my choice when you’re pushing heavy knees, large saddles, or doing long, demanding cuts. Expect a bit more installation effort, but it’s the one I’d use for heavy steel work or when torque is non-negotiable.
If you want one unit for everyday shop versatility, grab the GPOAS and consider a RATTMMOTOR JN400S for the axis that needs brute force. I’ve used both styles: value + support for general work, high torque for the heavy stuff. That combo covers almost every milling task.
As an Amazon associate I earn from qualifying purchases. Product prices and availability are accurate as of the date/time indicated and are subject to change. Any price and availability information displayed on Amazon at the time of purchase will apply to the purchase of this product.
Eky Barradas lives in Sioux Falls, South Dakota. He is an experienced industrial tools expert and DIY enthusiast with over 15 years in the industry. As a contributor to EngiMarket, he provides detailed and honest reviews to assist both professionals and hobbyists in selecting the best equipment. His goal is to foster a community of informed tool users through his insightful content on EngiMarket.
If anyone has installed multiple axes (X+Y+Z) with mixed brands (GPOAS + RATTMMOTOR + Vevor), how did you manage speed syncing or controller wiring? I’m more interested in the ergonomic control (one speed knob vs separate) and if you regret mixing brands.
Mixing brands is common. Each power feed typically runs off its own speed controller—some people wire them to a single footpedal or a master on/off but keep speeds separate. For synced feed rates, you either match model/gear ratios or use an external variable-frequency or voltage controller designed for multi-motor setups. Keep wiring tidy and fused per motor.
I have GPOAS on X and RATTMMOTOR on Y. I used a single footswitch for on/off and left separate speed dials. Syncing by ear/visual was good enough for me — not perfect but functional.
Am I the only one who thinks the RIEDHOFF 450 lb option looks like the Goldilocks of feeds? Not too cheap, not super fancy. How much actual machining usually needed for a clean mount on a real Bridgeport? I can do basic fab but would like a ballpark of time/parts required.
RIEDHOFF is often a good middle ground. For a Bridgeport it’ll typically need a small mounting plate and an adapter for the 5/8″ shaft (if your spindle/screw uses a different interface). If you have the plate cut and a few tapped holes, expect a few hours of shop time to align and fit.
If you haven’t jacked the knee before, be careful with alignment — a misaligned feed will bind. Use a straightedge and a test cut to verify before doing long runs.
Thanks for the roundup — love the depth on the GPOAS Power Feed. I installed one on an older Bridgeport clone last year and it really changed setup cadence for long runs.
Quick question: the unit specs say a 5/8″ shaft — did you need any adapter sleeves for older mills with slightly smaller shafts? I remember wrestling with alignment for a few hours. Also, any preferred locking method so the feed doesn’t creep under heavy cuts?
Good question — many users end up using a short, machined sleeve to adapt the 5/8″ end to older shafts or tapping into the shaft keyway if present. For preventing creep, I like a mild-pressure friction collar plus a secondary threaded lock on the shaft: it lets you fine tune without stressing the gearbox. Alignment is the key — shim the mount so the pinion meshes without side-load.
I used a split-collar and a 1/16″ shim under the mount. Took a while but no creep since. If you don’t have a lathe, a machine shop can turn a sleeve cheap.
Short and sweet: buy the nylon replacement gear and stash it. Saved my weekend once.
I keep one of those Milling Machine Power Feed Plastic Gears in the drawer and it’s been a lifesaver when the original stripped. Cheap insurance.
Questions: any tips on installing without messing up the new gear teeth? I assume clean installation and proper torque on the fastener, but any special lube recommendations?
Exactly — keep a spare. Clean the mating surfaces, use a light plastic-safe grease (PTFE-based is okay), and avoid over-tightening the retaining screw which can deform the nylon. If the gear rides with any lateral play, dress the shaft shoulder before fitting.
I also heat the nylon slightly with warm air (not hot) to let it slip on easier, then let it cool to seat. Works well for tight fits. And label the spare so you know it’s the gear for that mill — saved me from confusion once.
Haha fair. I used the 150lb for a while to practice mounting/alignment and then upgraded to the GPOAS for production. Saved me from making mistakes on the pricier unit.
That’s a fair take. The 150 lb unit is explicitly light-duty — great for learning how power feeds work and for non-critical light milling. If you foresee heavier saddles or frequent full-depth cuts, I’d step up to a 450+ in-lb unit.
Quick compatibility question that always trips me up: many of these are 110V but some list 120V. Will that matter in a US home shop? I have 110/120 outlets but don’t want to fry anything or run like a tourist plug adapter 😂
I’ve run both 110 and 120 labeled motors for years — no issues. Just make sure to wire to a grounded circuit and don’t chain extension cords for heavy loads.
Most listings mean essentially the same thing; North American mains is nominally 120V. The important part is the motor wiring and plug type. If the unit is rated 110V it will run fine on 120V. Check for a proper plug/ground and any required fusing. If you’re unsure, use a dedicated outlet and a breaker-sized fuse.
Great list — I ended up getting the GPOAS on your advice. Best value indeed. Very smooth and the customer support actually replied to my fitment questions 😮
I’m eyeballing the RATTMMOTOR JN400S for some heavy knee work. 650 in-lb sounds great, but how loud are these compared to a stock hand crank? I need something smooth for finish passes more than brute force.
The JN400S runs smoother than many other high-torque units thanks to its internal gearing, but it won’t be whisper-quiet — expect a low mechanical hum at moderate speed. For finish passes, dial speed/torque so the feed rate is consistent; that matters more than absolute noise level.
The VEVOR Z-Axis feed seems useful for quill and knee lifting. Has anyone used it specifically for delicate depth-of-cut repeatability on a DTI setup? I worry about backlash when switching directions frequently.
The Z-axis units are good for controlled lifting and repeatable plunges if you take care of backlash. Preload the coupling where possible and use a fine adjustment stop for repeatability. Expect some minimal backlash in cheaper units; for micrometer-level repeatability, supplement with a mechanical stop or a DRO readout.
I used one for setting repeatable quill depths — it’s fine for +/- 0.01″ or so with a snug coupling and a tweak to eliminate slack. Not a micrometer head replacement, though.
I almost ordered the RATTMMOTOR BJS-235 but hesitated after reading the ‘requires workshop skills’ note. Anyone here had units arrive with shipping blemishes like the review mentioned? How painful was the fix?
I got one with a scratched cover; nothing affecting performance. I built a simple bracket from 1/4″ plate and bordered it with rubber to absorb misalignments — worked well.
Some customers do see minor cosmetic shipping damage. Functionally they’re usually fine, but the larger issue is that the BJS-235 often needs custom mounting work. If you have fabricating skills or access to a shop, it’s a great unit; otherwise budget for a machinist to help.











If anyone has installed multiple axes (X+Y+Z) with mixed brands (GPOAS + RATTMMOTOR + Vevor), how did you manage speed syncing or controller wiring? I’m more interested in the ergonomic control (one speed knob vs separate) and if you regret mixing brands.
One more tip: label each feed dial with axis and mark your typical feed settings for common operations — saves a lot of trial-and-error.
Mixing brands is common. Each power feed typically runs off its own speed controller—some people wire them to a single footpedal or a master on/off but keep speeds separate. For synced feed rates, you either match model/gear ratios or use an external variable-frequency or voltage controller designed for multi-motor setups. Keep wiring tidy and fused per motor.
I have GPOAS on X and RATTMMOTOR on Y. I used a single footswitch for on/off and left separate speed dials. Syncing by ear/visual was good enough for me — not perfect but functional.
Am I the only one who thinks the RIEDHOFF 450 lb option looks like the Goldilocks of feeds? Not too cheap, not super fancy. How much actual machining usually needed for a clean mount on a real Bridgeport? I can do basic fab but would like a ballpark of time/parts required.
RIEDHOFF is often a good middle ground. For a Bridgeport it’ll typically need a small mounting plate and an adapter for the 5/8″ shaft (if your spindle/screw uses a different interface). If you have the plate cut and a few tapped holes, expect a few hours of shop time to align and fit.
I made a simple L-bracket in an hour and tweaked for alignment an extra 30-60 minutes. If you’re doing keyways or special collars, add another hour.
Awesome — sounds doable. Thanks all!
If you haven’t jacked the knee before, be careful with alignment — a misaligned feed will bind. Use a straightedge and a test cut to verify before doing long runs.
Thanks for the roundup — love the depth on the GPOAS Power Feed. I installed one on an older Bridgeport clone last year and it really changed setup cadence for long runs.
Quick question: the unit specs say a 5/8″ shaft — did you need any adapter sleeves for older mills with slightly smaller shafts? I remember wrestling with alignment for a few hours. Also, any preferred locking method so the feed doesn’t creep under heavy cuts?
Good question — many users end up using a short, machined sleeve to adapt the 5/8″ end to older shafts or tapping into the shaft keyway if present. For preventing creep, I like a mild-pressure friction collar plus a secondary threaded lock on the shaft: it lets you fine tune without stressing the gearbox. Alignment is the key — shim the mount so the pinion meshes without side-load.
Also check the gear mesh after 24hrs of light running — things settle. I learned that the hard way 😅
I used a split-collar and a 1/16″ shim under the mount. Took a while but no creep since. If you don’t have a lathe, a machine shop can turn a sleeve cheap.
Short and sweet: buy the nylon replacement gear and stash it. Saved my weekend once.
I keep one of those Milling Machine Power Feed Plastic Gears in the drawer and it’s been a lifesaver when the original stripped. Cheap insurance.
Questions: any tips on installing without messing up the new gear teeth? I assume clean installation and proper torque on the fastener, but any special lube recommendations?
Exactly — keep a spare. Clean the mating surfaces, use a light plastic-safe grease (PTFE-based is okay), and avoid over-tightening the retaining screw which can deform the nylon. If the gear rides with any lateral play, dress the shaft shoulder before fitting.
I also heat the nylon slightly with warm air (not hot) to let it slip on easier, then let it cool to seat. Works well for tight fits. And label the spare so you know it’s the gear for that mill — saved me from confusion once.
Bought the Vevor Power Feed X-Axis 150lb model as a ‘budget test’ and — surprise — it’s honestly what you’d expect from a $100 impulse buy.
– Good for hobby parts
– Not for slamming through steel
– Came with slightly rough paint
Would I recommend it? For learning installs and light 6061 work, sure. For any heavy-duty work, lol no 😂
Haha fair. I used the 150lb for a while to practice mounting/alignment and then upgraded to the GPOAS for production. Saved me from making mistakes on the pricier unit.
Thanks — I might keep it as a spare/teaching tool. Also, that paint… sanded and rattle-can’d it in an afternoon. Looks decent now.
Pro tip: if you keep it for light work, add a small oil reservoir and check meshing often — plastics and cheap bearings show wear quicker. 🙂
That’s a fair take. The 150 lb unit is explicitly light-duty — great for learning how power feeds work and for non-critical light milling. If you foresee heavier saddles or frequent full-depth cuts, I’d step up to a 450+ in-lb unit.
Quick compatibility question that always trips me up: many of these are 110V but some list 120V. Will that matter in a US home shop? I have 110/120 outlets but don’t want to fry anything or run like a tourist plug adapter 😂
I’ve run both 110 and 120 labeled motors for years — no issues. Just make sure to wire to a grounded circuit and don’t chain extension cords for heavy loads.
Thanks — that puts my mind at ease.
Most listings mean essentially the same thing; North American mains is nominally 120V. The important part is the motor wiring and plug type. If the unit is rated 110V it will run fine on 120V. Check for a proper plug/ground and any required fusing. If you’re unsure, use a dedicated outlet and a breaker-sized fuse.
Great list — I ended up getting the GPOAS on your advice. Best value indeed. Very smooth and the customer support actually replied to my fitment questions 😮
Mind sharing how long it took you to setup? I’m tempted but worried about wasting a weekend.
Glad it worked out! GPOAS has surprised a few people with responsive support. Keep an eye on the keyway alignment during initial runs.
I’m eyeballing the RATTMMOTOR JN400S for some heavy knee work. 650 in-lb sounds great, but how loud are these compared to a stock hand crank? I need something smooth for finish passes more than brute force.
I have one on my knee mill — it’s not loud like a compressor, more of a steady gear whirr. Definitely smoother than manual cranking for fine finishes.
The JN400S runs smoother than many other high-torque units thanks to its internal gearing, but it won’t be whisper-quiet — expect a low mechanical hum at moderate speed. For finish passes, dial speed/torque so the feed rate is consistent; that matters more than absolute noise level.
The VEVOR Z-Axis feed seems useful for quill and knee lifting. Has anyone used it specifically for delicate depth-of-cut repeatability on a DTI setup? I worry about backlash when switching directions frequently.
The Z-axis units are good for controlled lifting and repeatable plunges if you take care of backlash. Preload the coupling where possible and use a fine adjustment stop for repeatability. Expect some minimal backlash in cheaper units; for micrometer-level repeatability, supplement with a mechanical stop or a DRO readout.
I used one for setting repeatable quill depths — it’s fine for +/- 0.01″ or so with a snug coupling and a tweak to eliminate slack. Not a micrometer head replacement, though.
I almost ordered the RATTMMOTOR BJS-235 but hesitated after reading the ‘requires workshop skills’ note. Anyone here had units arrive with shipping blemishes like the review mentioned? How painful was the fix?
Thanks — good to know it wasn’t a catastrophic arrival. I can fab, but just didn’t want to clean up a mess on day one.
I got one with a scratched cover; nothing affecting performance. I built a simple bracket from 1/4″ plate and bordered it with rubber to absorb misalignments — worked well.
Some customers do see minor cosmetic shipping damage. Functionally they’re usually fine, but the larger issue is that the BJS-235 often needs custom mounting work. If you have fabricating skills or access to a shop, it’s a great unit; otherwise budget for a machinist to help.