


Can a digital readout stop you from ruining one more drill bit (and your pride)?
Nothing ruins a perfect project like drilling too deep. I’ve been there — that audible thunk when a bit suddenly meets table or passes through a part. It’s ugly and avoidable.
I want tools that add precision without drama. A drill press with a good DRO gives repeatable depth, faster setups, and fewer ruined parts. Short learning curve, big payoff.
Our Top Picks

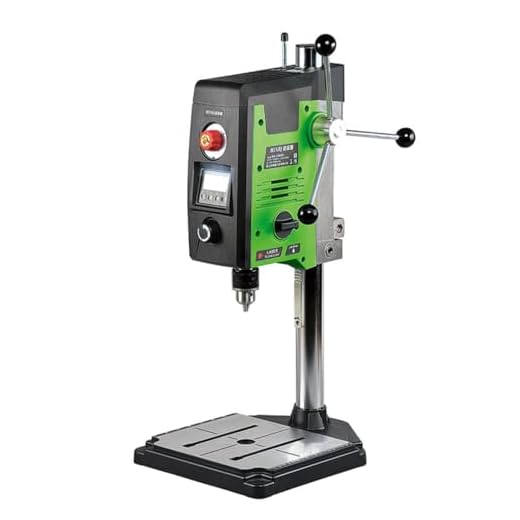

KAKA GD-25 Industrial Drill Press DRO
I see this as a serious industrial machine for shops that need continuous heavy-duty drilling with precise depth control. The cast-iron construction, DRO, and 0.9 kW motor make it a reliable choice for demanding metalwork — provided you have the electrical and floor capacity for it.
Who this machine is for
I recommend this model to professional shops and serious hobbyists who have the infrastructure to support an industrial machine. The GD-25 version includes a DRO depth control and a 0.9 kW three-phase motor, which is designed for continuous work in steel and cast iron. If you need to drill 1" holes in steel or run repeated tapping cycles (M16 capability mentioned), this machine will do it reliably.
Key features I appreciate
Practical considerations and limitations
This is not a plug-and-play hobby press: its weight (~444 lb) and 220V three-phase power requirement mean you’ll need a forklift or shop crane to position it and an electrician to handle service connections. The upside is durability and repeatable accuracy in a production environment, but you pay for that in cost and logistics.
Installation and usage tips from my perspective
If you run a small production line or do a lot of heavy metalwork, I think the GD-25 is worth the investment. For most home shops, the machine’s power and payload are overkill unless you’re prepared to deal with the installation and cost overhead.
BACHIN 800W Mini Bench Drill Press
I found this press to be a surprisingly capable, compact workhorse for a small shop. The integrated digital display, laser, and light make set-up and pilot drilling faster, and the 800W motor gives real capability for wood and light metal work.
Overview and intended uses
I treat this as a compact, feature-rich bench drill press for hobbyists and small shops. It brings an 800W brushed motor, six-speed/variable control covering roughly 200–2500 rpm, a digital LCD that shows speed and stroke/depth, plus a laser pointer and work light for quick alignment. For plywood, plastics, aluminum and light steel, it’s quite capable.
What stands out for me
Practical observations and limitations
Mechanically it’s a competent, economical tool, but like many compact presses there are trade-offs. The unit can be loud at higher RPMs; the gearbox/gear whine is noticeable and the lever spring is firm — that’s fine for production but can be fatiguing for long run times. A few users reported head drift unless the slide tensioning screws are adjusted and lubricated.
Tips I use to get the best results
Overall I like this as a go-to small press when bench space is limited but performance still matters. It's a practical middle ground between tiny hobby presses and full-sized cast-iron machines.
iGaging EZ-Depth Drill Press DRO
I found this little DRO to be an affordable way to add repeatable depth control to a benchtop press. It delivers very fine resolution and is a dramatic upgrade if you invest a bit of time in a rock-solid mount.
What it does and who it's for
I use this compact digital readout when I want precise, repeatable depth control on a budget drill press. The unit reads in inches, millimeters and fractional inches, and claims a 0–5" (0–125 mm) range with 0.001" accuracy and a 0.0005" display resolution. For small-shop woodworking, guitar building, and light metalwork it's a massive value add.
Key features I care about
Real-world benefits and limitations
In practice, the readout is crisp and repeatable — but only if you mount it solidly. Several users (and I) found the supplied mounting hardware to be underwhelming; the rail and brackets are fine, but the tiny screws and the soft tap in the kit often mean you should plan to fabricate a stiffer top/bottom mount. Once you do that, the unit behaves like a precision stop and makes repetitive pocket depths and fret marker drilling much easier.
Practical tips from my experience
I like this unit because it gives real, usable precision without breaking the bank. If you’re comfortable fabricating a simple, rigid mount it’s one of the best value upgrades you can add to an older benchtop drill press.
Final Thoughts
If you run a busy metal shop or need a floor-mounted workhorse, pick the KAKA GD-25 Industrial Drill Press DRO. I recommend it as the number‑one choice for heavy-duty, continuous use: cast-iron build, a stout 0.9 kW motor, and a true industrial DRO make it a dependable center for metal fabrication and production runs.
If your shop is small, you mostly work on wood or occasional light metal, and space is tight, go with the BACHIN 800W Mini Bench Drill Press. It’s compact but capable, with an integrated display, laser, and light that speed up setup. The iGaging EZ-Depth is not a full machine recommendation in itself — it’s the smartest budget move if you already own a benchtop press and want precise, repeatable depth control without buying a new head.
Guide: How I Choose and Use Drill Presses with DROs
I always start with the shop reality: what materials I drill most, how often, and how much floor space I have. That narrows the field quickly. For high-volume metalwork, table stability, motor torque, and a full-featured DRO are non-negotiable. For hobby benches, compact footprint, convenience features (laser, light), and an easy-to-read display matter more.
Why a DRO is worth it
Quick comparison
| Model | Best for | Standout feature |
|---|---|---|
| KAKA GD-25 | Industrial metal shops | Cast-iron build + robust DRO + 0.9 kW motor |
| BACHIN 800W | Small shops & woodworking | Integrated display, laser, compact power |
| iGaging EZ-Depth | Budget upgrades | Affordable, fine resolution for retrofit |
Installation and mounting tips
If you’re adding a DRO (like the iGaging), spend time on the mechanical mount. I’ve learned that even the best readout is useless on a flexy bracket. Use hardened fasteners, backing plates, and chase the smallest gap between the scale and the tool. For bench presses, clamp location matters — mount where you get the cleanest, most direct measurement of quill motion.
Speed, motor, and horsepower — what matters
Horsepower and torque matter more than top RPM for metal drilling. The KAKA’s 0.9 kW motor gives sustained torque for larger bits and tough alloys. For wood and light metal, the BACHIN’s 800W motor is plenty. Look for variable speed or stepped pulleys if you’ll switch between materials often.
Practical workflow and maintenance
I set and zero the DRO on a test piece before any critical run. When I need repeat holes, I use stops plus the DRO for backup. Keep the scale clean — chips and coolant are the DRO’s enemies. Periodically verify the readout against a known gauge block, especially after heavy use or any knocks.
If you’re deciding between buying an integrated DRO machine or retrofitting: choose retrofit (iGaging) when the base press is solid and you’re on a budget. Choose integrated (KAKA or BACHIN) when you want factory fit, fewer mounting headaches, and features designed around the scale. I prefer to invest in rigidity first — the DRO’s precision only shines when the machine is stable.
FAQ
Yes — in practical terms a DRO gives you two advantages: repeatable numeric depth and finer resolution. A mechanical stop can be quick, but it’s prone to flex, play, and inconsistent clamping. A digital readout tells you exactly where you are to fractions of a millimeter or thousandths of an inch, which matters when you’re doing batches or precision metalwork.
Absolutely — that’s exactly what it’s for. The catch is the mount. You’ll need a rock-solid bracket and a vibration-free mounting surface. If you spend a little time making a rigid mount, the iGaging will deliver professional-level repeatability for a fraction of the cost of a new press.
Probably — it’s an industrial machine with a 0.9 kW motor. Depending on your model/version and local electrical codes, you may need a dedicated circuit or a higher-capacity outlet. Check the spec plate and consult an electrician if you’re unsure.
Calibration is straightforward: use a known reference (calibrated gauge block or depth mic). Zero the readout at the reference point, move the quill a known distance and confirm the DRO reads that distance. Repeat at several positions to ensure linearity. Small adjustments to the mounting or software zero will tune it.
The BACHIN 800W Mini Bench Drill Press. Its compact footprint, integrated light and laser, and 800W motor give real capability for hardwoods and light metal drilling without taking over your shop.
Wipe and protect the scales or readout rail from chips and coolant. Keep the quill and spindle lubricated per the manual. Check mounting bolts for tightness. Replace worn belts and brushes on motors as recommended. Small, regular checks prevent calibration drift.
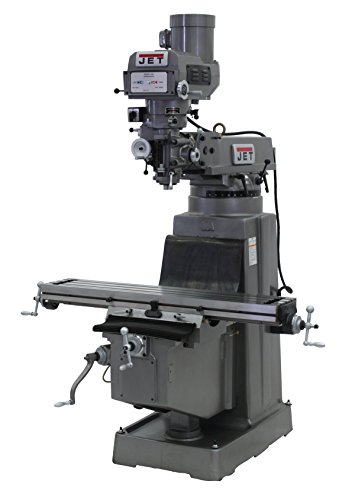





I bought the BACHIN bench press last winter for small projects and it’s been surprisingly solid for woodworking. The digital display and onboard light make set-up so fast.
A few notes from my experience:
– The 800W motor has enough grunt for hardwood drilling if you take small steps.
– The laser is handy but recalibrate it occasionally.
– Mount the base to your bench — it WILL creep if you don’t.
All in all, great value for small shops. Would recommend if you don’t need industrial power.
Agree on the laser — mine started to wander after a few months. It’s still a great unit for DIYers though. 👍
Thanks for the practical tips, Grace. The note about the base drifting is a good warning — bolting or clamping is often overlooked.
Quick question — has anyone mounted the iGaging Drill Press DRO EZ-Depth onto the BACHIN Bench Drill Stand? The BACHIN’s setup is pretty compact and I’m wondering if the DRO will fit cleanly or if I’d need a custom bracket. I don’t wanna wreck the nice compact footprint.
You might also check if the BACHIN has any accessory holes on the column sleeve. If so, you can clamp a bracket there instead of modifying the drill.
Also consider the DRO’s cable routing — keep it clear of the chuck and axis movement to avoid snagging. A short zip-tie and braid sleeve goes a long way.
I fitted an iGaging to a similar benchtop and used a 3/16″ aluminum plate as a spacer/bracket. Drilled & tapped into the base of the motor housing — hold the DRO with double-sided tape while you mark it. Works great.
The iGaging DRO is small and designed for benchtop presses, but a rock-solid mount is key. Many people make a simple aluminum bracket that clamps to the column or table. Make sure the readout scale is aligned perfectly parallel to the quill travel.
I’m deciding between the BACHIN + iGaging combo and just going all-in on the KAKA. I run a tiny alloy parts shop (couple of hours a day) — precision matters but I’m not doing big batches yet. Price and footprint are big factors. Thoughts? Which one would you pick if you were starting out and might scale later?
If scaling is uncertain and space/electrical limits are tight, go BACHIN + iGaging — lower upfront cost and you can upgrade later. If you know you’ll scale into heavy production and can handle 3-phase and a heavy machine, KAKA is the long-term choice.
Agree with admin. The BACHIN route gives flexibility — and the iGaging will cover most precision needs early on. Later you can sell/ trade up to a KAKA if volume demands it.
I started with a benchtop and upgraded later. No regrets — saves capital early and teaches you what features you actually need.
iGaging DRO for the win if you’re on a budget. I mean, why drop big bucks on an industrial machine when you can slap that little DRO on your old press and get repeatable depths? 😂
That said, yes, you do need to spend time making a sturdy mount and double-check calibration. Not magic, but a massive upgrade for the price.
I used an iGaging for some dovetail pilot holes and it made life so much easier. Can’t recommend it enough for small shops.
How’s the resolution on that DRO? I need to do some shallow countersinks and depth accuracy matters.
The iGaging is praised for fine resolution — check the spec sheet for exact increments, but users commonly report very precise repeatable stops when mounted properly.
Totally — the iGaging gives you repeatability but not necessarily the rigidity or spindle life of a larger machine. For occasional metalwork it’s perfect though.
It sounds tempting — but I’m still undecided between upgrading my old press with iGaging or just saving for a KAKA down the line.
I’m on the fence about the KAKA vs a benchtop like the BACHIN.
I mostly do thicker aluminum parts and occasional mild steel — I don’t have a 3-phase outlet and my garage floor isn’t reinforced. The KAKA sounds perfect for metal but I’m worried about installation and overkill. Any weight numbers or transport tips? Also, is the DRO on the KAKA worth the extra hassle of 3-phase?
If you rent, check the seller — some sellers include freight to the door and can help with lifting. Otherwise, yes, it’s a two-person (or more) job and quite heavy.
KAKA is heavy — cast iron and industrial internals — so plan for a forklift or at least multiple strong helpers and a pallet jack. If you’re doing lots of steel/aluminum and want precision, the DRO plus the machine’s rigidity is worth it. But if your work is light-to-medium and you can’t accommodate the electrical/floor needs, a BACHIN + iGaging might be more practical.
If you can’t get 3-phase easily, consider a rotary phase converter or a VFD that can run 3-phase motors from single-phase supply. Adds cost but keeps industrial performance.
Heads up for folks calibrating DROs: always zero with the quill at a reference stop and use shims or feeler gauges to verify depth against a physical gauge block. The electronics are great, but mechanical backlash and mount flex are the usual culprits if you lose accuracy.
For the iGaging especially, spend an hour on mounting rigidity and your measurements will be way more trustworthy.
Excellent practical advice, Diego. Backlash compensation routines are handy but the best fix is a stiff mount and verifying with a physical gauge.
I made a small dovetail mount to remove play on my iGaging — cured almost all the backlash I was seeing. Worth the extra work.
Really appreciate the deep dive on the KAKA INDUSTRIAL unit. I’ve been eyeballing a heavy-duty press for my metal fab shop but was worried about the 3-phase requirement.
The DRO depth control and cast-iron build sound ideal for production runs, but can anyone confirm how loud the gearbox is under continuous use? Also — does anyone have tips for wiring a 220V 3-phase in a small shop without calling an electrician for every tweak? 😅
KAKA in my shop is loud-ish but nothing I couldn’t live with — ear protection during long sessions is a must. If floor capacity is a concern, put it on a welded steel base and bolt to concrete.
I installed a static phase converter for a similar motor. It worked okay for intermittent use but not ideal for heavy continuous runs. If you’re running long shifts, go full 3-phase supply.
If you don’t already have 3-phase, bringing it in usually requires an electrician and possibly a transformer or a phase converter. For noise, most users report it’s typical for industrial gear heads — not silent but not obnoxiously loud if mounted on a solid floor. Vibration isolation pads help.
I ordered the BACHIN bench press because I loved the compactness and the digital display. Setup was straightforward but the laser alignment was off out of the box. Took me a while to get it lined up properly.
Also, the chuck key location is awkward — I dropped it three times 😩. Otherwise it’s a cute little machine. Would be 5 stars if the manufacturer paid attention to user ergonomics. lol 😂
Thanks for the real-world note, Evelyn. Out-of-the-box laser alignment issues are common — recalibrating with a center punch and test drill often fixes it. And agreed, a keyed storage slot would be nice.
Lol chuck key drops are a rite of passage. 😆
Same here. A tiny magnet on the table works if the key material is ferrous.
I keep my chuck key on a short chain attached to the table lip — solved the drop problem for me.