


Stop the wheeze — which RapidAir kit will make your shop breathe like a pro?
Airflow beats horsepower. A choked header makes your impact wrench feel like a toy. I’ve seen busy shops transform overnight just by upgrading their piping.
I dug into 10 RapidAir/Maxline/FastPipe kits and regulator combos. Short takes, real strengths, and who each one actually helps. No fluff — just what I’d buy.
Top Picks

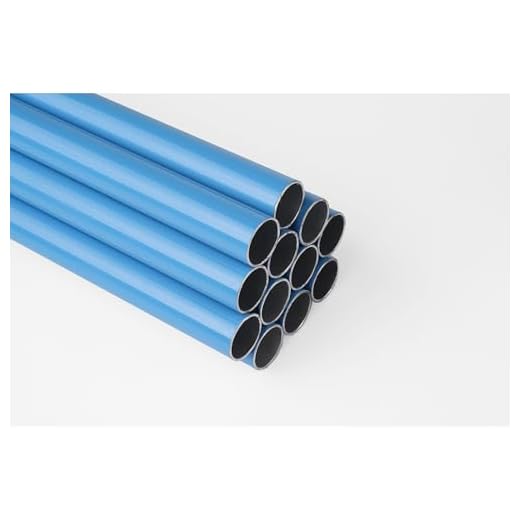
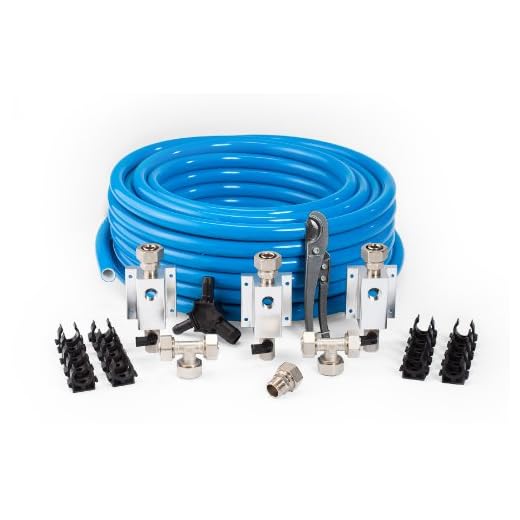


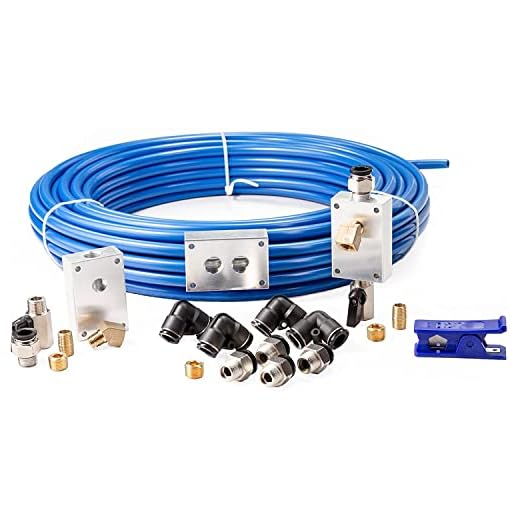


3/4-inch FastPipe 240-ft Master Kit Deluxe
A large master kit that gives you a professional backbone for big shops or multi-user environments. It reduces the need to source additional fittings and keeps air clean and consistent across long installations.
When to pick the 240-ft kit
I choose a 240-ft master kit when I’m planning an extensive layout—multiple workstations, ceiling-mounted reels, or a multi-bay garage. The extra length plus a broad set of fittings reduces the chance you’ll run out mid-project and saves time sourcing extras.
What stands out in the contents
That completeness is the kit’s advantage: fewer surprises and fewer trips back to the supplier. The aluminum tubing stays clean internally which lowers downline maintenance on tools and filters.
Real-world considerations
Because the kit is large and heavier than small sets, plan helpers or lift assistance for ceiling installations. Also, while it minimizes the need for additions, you should still map your layout and inventory needed clamps and fittings before starting.
For professional garages or ambitious DIYers building a future-proof system, this is the kind of all-in-one kit I rely on to avoid do-overs.
1-inch FastPipe 235-ft Pro Piping Kit
A heavy-duty aluminum system built for long runs and high-volume use. It shines where rust resistance, neat installation, and reduced pressure loss matter most.
Why I like this kit
I reached for this unit when I needed a shop plumbing solution that would last—no rust, no sweating, and a professional look. The 235-foot, 1-inch FastPipe kit is designed for longer runs and heavier tool usage than small nylon systems, so it’s ideal if you plan to run multiple high-flow tools or cover a large shop.
Key features and what they mean in practice
Those features translate to fewer maintenance headaches and lower long-term energy costs. I appreciated that the compression fittings let me work alone for most of the install; they’re fast to make up and forgiving if you need to reposition a drop.
Installation tips and limitations
I recommend sketching your layout ahead of time and pre-counting clips and tees. The kit is substantial in size and weight, so plan mounting points and a helper if you’re running ceiling routes. Also, while compression fittings are quick, they can be pricier than generic push-to-connect pieces if you need a lot of extras.
If you want a long-lasting, professional-grade backbone for your shop’s compressed air system, this is the kind of kit I reach for. It’s an investment up front, but the reduced corrosion risk and efficient airflow make it worth it for serious setups.
Maxline M7500 3/4-inch 100-ft Master Kit
This 3/4-inch kit gives extra breathing room for demanding tools and multiple simultaneous users. It’s an excellent step up for anyone unhappy with the limitations of 1/2-inch runs.
Who this kit suits
I recommend the M7500 when you want a practical upgrade from 1/2-inch systems—think automotive shops, larger home shops, or anyone who runs impact wrenches and grinders regularly. The larger internal volume noticeably reduces tool fatigue caused by pressure drop.
What’s in the box and why it helps
In my installs the kit made a clear difference when I switched from 1/2-inch: impacts felt stronger and tools recovered pressure faster. Users report quick installs and long-term trouble-free service when clips are spaced properly and outlets are well planned.
Practical advice and shortcomings
You’ll want to plan conduit routes to avoid sharp turns and to keep runs as straight as practical. Also, budget a few extra fittings; it’s common to need additional tees or elbows as you refine outlet placement.
If you want a robust, user-friendly system that supports heavier shop workflows, this is the kit I often recommend.
Maxline M3800 1/2-inch 100-ft Kit
An established kit that keeps customers coming back because it’s reliable, economical, and straightforward to install. It’s a practical standard for light-to-medium duty shop plumbing.
What I like about this kit
I’ve used this M3800 kit in home and small business shops and it consistently performs. It’s a great entry point into a permanent shop plumbing system: light, corrosion-resistant, and easier to work with than rigid piping.
Practical specs and benefits
The kit’s manageability is a big plus—one person can make steady progress mounting loops and drops. Reviewers commonly cite easy installation and long-term reliability; I’ve had systems run years with minimal maintenance when installed correctly.
Tips and limitations
If you expect to run long distances or high-CFM tools (large impact wrenches, air sanders), plan on either upsizing to 3/4-inch or looping the line back to the source. Use quality thread sealant on NPT joints and a consistent clip spacing to keep runs neat and supported.
For most weekend mechanics and small shops, this kit hits the sweet spot between cost, convenience, and performance.
3/4-inch FastPipe 90-ft Master Kit
A well-rounded 3/4-inch kit that supports heavier tools and multiple drops while staying easy to install. It’s my pick when you need higher flow than 1/2-inch but don’t want to overspend on industrial piping.
Why choose the 3/4-inch kit
I reach for a 3/4-inch kit like this when my shop runs more demanding tools—impact guns, grinders, sanders—or when I want several outlets to maintain pressure under load. It gives noticeably better volume than 1/2-inch while staying much easier to install than rigid black iron.
Features that matter day-to-day
In practice the kit installs quickly and looks professional. The included cutting and reaming tools make clean connections straightforward. I found the line holds pressure well and the smooth bore reduces line freeze and moisture traps compared with old iron pipe.
Downsides and real-world tips
You’ll need room to make wide-radius bends; don’t try to force tight 90s. Also budget for a few extra fittings or clips—most installs end up needing a handful more than the kit supplies. For long runs, consider looping the system so air can flow from both directions to a busy outlet.
Overall, this is a solid pick if you want a durable, higher-capacity shop plumbing solution without the weight and permanence of black pipe.
3/4-inch NPT Filter Regulator Unit
A beefier combo regulator for systems that need larger connections and greater flow. It keeps pressure stable and helps protect tools in busier shops and higher-CFM setups.
When I pick the 3/4-inch regulator
I use a 3/4-inch filter/regulator when the main supply or hose reels call for higher flow—automotive bays, multiple simultaneous users, or when you’ve upsized your header from 1/2-inch. The larger ports reduce restriction and keep tools responsive under load.
What this unit delivers
In my setups the unit provides solid pressure control without introducing leak-prone external plumbing. It’s particularly handy when installed close to the work area where you want both filtration and quick pressure adjustments.
Practical tips and caveats
If you run very moisture-prone air, pair this with an upstream dryer or coalescing filter. The gauge is functional, but if you rely on a glanceable readout from across the shop, a larger remote gauge is a nice addition.
For larger hobby shops and small commercial environments, this model balances capacity and convenience effectively.
1/2-inch NPT Filter Regulator Unit
A space-saving combination filter/regulator that cleans and controls shop air without taking up much room. It’s a reliable mid-priced option for most compressors and service lines.
Why I install a filter/regulator early in the line
A good filter/regulator saves tool wear and improves consistency. I usually mount one right after the compressor or at the point-of-use regulator so I can set working pressure and remove particulates before they reach hand tools.
Key specs and day-to-day benefits
The unit is compact yet effective for routine shop needs. I like the simple mounting bracket and the reversible flow option—it makes placement flexible. For very wet environments you’ll still want a coalescing or refrigerated dryer upstream, but this unit cleans most particulate and reduces tool contamination.
Practical considerations
The gauge size is small, so consider adding a remote or larger gauge if you need quick visual readout across the shop. Overall, it’s a cost-effective piece of hardware that I consider essential for clean, regulated air at the bench.
If you want a simple, reliable regulator/filter combo without fancy bells, this one does the job well.
90500 1/2-inch 100-ft Accessories Master Kit
A compact, easy-to-install nylon master kit that works well for neat, low-demand setups. It’s especially handy where portability or inside-wall routing matters more than maximum flow.
Ideal applications
I recommend this kit when you want a slim, easy-to-hide air delivery system—think finished garages, home workshops, or retrofit installs inside walls. The nylon tubing is easier to route through framing and less intimidating than metal lines.
What you get and how it performs
In my experience the tubing is manageable and the cutter yields clean ends. It’s great for nailers, staplers, and general blow-off tasks, but I’d be cautious about running heavy continuous-demand tools without upsizing or short hose runs.
Limitations and installation tips
You’ll need to buy quick-couplers and think about protecting tube ends when doing drywall or painting. Use cable straps or the optional clips in high-vibration areas to keep lines secure.
If portability, ease of install, and a tidy look are top priorities, this kit is one of the simplest ways to get plumbed air into a small shop.
M7500 3/4-inch 100-ft Maxline Shop Kit
A cost-conscious 3/4-inch kit that supplies the essentials for a higher-capacity header. Good for DIYers who want improved flow without premium branded pricing.
Who should consider this kit
I view this kit as a smart pick for people who want the benefits of 3/4-inch plumbing but are on a budget. If you’re upgrading from 1/2-inch and want better performance without premium cost, this is worth a look.
Kit highlights and field notes
The included clip packs and fittings make it easier to finish a clean install without many extra purchases. That said, in some installs I swapped in a few higher-quality fittings for critical joints to ensure longevity.
Practical guidance
Double-check the parts list against your planned layout—some installs need extra tees or elbows. Also plan bends with generous radii and secure mounting to avoid stress on fittings.
This kit is a pragmatic compromise for serious DIYers who want better airflow without going full pro-grade on price.
M3800 1/2-inch 100-ft RapidAir Kit
An economical 1/2-inch Maxline-style kit that covers routine shop needs and basic tool usage. Fit and finish are a step down from OEM branded kits, but it performs well for the price.
What this kit is for
I recommend this kit when you want a functional 1/2-inch compressed air loop without paying top-dollar. It gives you the core components—tube, manifold, outlets, and handy tools—so you can get a basic system installed quickly.
Notable inclusions and hands-on impressions
In use I found it easy to hook up and reliable for light to moderate shop tasks. A couple of reviewers noted the fittings are not OEM RapidAir quality; I agree some joints benefit from replacing the compression nuts with branded ones if you want better long-term sealing and smoother assembly.
Practical tips and limitations
The kit is a solid value, but I treat it as a pragmatic compromise: buy it to save money, and consider swapping in higher-quality fittings at pressure points. Also, if you plan to run heavy continuous-demand tools far from the compressor, upgrade to 3/4-inch or add a loop back to reduce pressure drop.
For hobbyists and light commercial users on a budget, this kit is one of the easiest ways to get plumbed air without a big investment.
Final Thoughts
I recommend the 3/4-inch FastPipe 240-ft Master Kit Deluxe as my top pick. I’d choose it when you run a multi-user shop, have long runs, or want a professional backbone that reduces extra fittings and keeps air clean and consistent across the whole layout. Its high expert rating and comprehensive parts make it the quickest way to get reliable, high-flow performance without hunting for missing pieces.
If you need the absolute highest corrosion resistance and the best performance on very long, high-volume runs, go with the 1-inch FastPipe 235-ft Pro Piping Kit. Its heavy-duty aluminum construction minimizes pressure loss and rust over time, so it’s ideal for shops that push lots of CFM and want a neat, long-lasting installation.







Short version: M7500 vs M3800 — are we talking “butter knife” vs “cleaver” for airflow? 😆
I have a couple of impact guns and a small blast cabinet. The M7500 Master Kit 3/4″ x 100′ sounds tempting for the extra flow, but the RapidAir 1in. F2000-12 (235′) kit also got a high score. Anyone used the 1″ kit in a home garage? Is it total overkill or actually worth the price?
One more tip: if you go 3/4″, pair it with an appropriately sized regulator (the 3/4″ K93217) so you don’t bottleneck at the filter/regulator stage.
If you regularly use multiple high-CFM tools at the same time (impact guns + blast cabinet), the 3/4″ M7500 is a very practical upgrade over 1/2″ kits. The 1″ RapidAir F2000-12 is great for long runs and near-industrial setups — it’s not strictly necessary for most home garages and comes at a premium. For a busy two-tool setup, 3/4″ is the sweet spot.
Haha James, I love the knife analogy. If you want future-proofing and minimal pressure loss on long runs, the 1″ is lovely — but wallet will complain.
If you ever want to add a mini-paint booth or more than 2 tools at once, the 1″ will feel nicer. Otherwise stick with 3/4″ and spend the savings on better drops/fittings.
Used the M7500 in my garage for 2 years. Big difference vs 1/2″ for simult use. No regrets. But the 1″? nah unless you’re running crazy long mains or 3+ bay business.
Quick question about the filter regulators: how different are the Rapidair K93217 (3/4″) and K93216 (1/2″) in terms of maintenance and filter capacity? I’m planning a light-to-medium duty setup — probably the Maxline M3800 1/2″ x 100′ — and I don’t want to overspend on a giant regulator if it’s not needed.
I run the K93216 on my 1/2″ line for years. Change the bowl/drain regularly and you’ll be fine. No need to spend up for the 3/4″ unless your tools demand it.
The main differences are flow capacity and physical size. The K93217 handles higher CFM and larger connections, so it has a bigger filter bowl and longer service intervals under heavy use. For a Maxline M3800 1/2″ setup used in light-to-medium duty, the K93216 is usually the right fit — it’s more compact and costs less while providing adequate filtration/regulation.
Thanks for the roundup — super helpful!
I’m leaning toward the 3/4″ FastPipe Aluminum Compressed Air Tubing 240 FT Master Kit (F18240) for my small multi-bay shop. The review makes it sound like a proper backbone, but a couple of questions:
1) Do I need the 3/4″ Rapidair K93217 regulator with that kit, or will the 1/2″ K93216 do if I only run two heavy tools at once?
2) Has anyone run the 240 ft kit inside walls or should I keep it exposed? Worried about thermal expansion and access for repairs.
Appreciate any real-world tips — I’m not great with pipe math 😂
Installed the 240ft kit last year in a 3-bay shop. If you ever think you might add a 3rd heavy tool, go with the 3/4″ regulator. I used the K93217 and never regretted it. Inside-wall routing was fine for me — just put easy-access shutoffs at each bay.
FWIW, I kept my FastPipe exposed for a few months until I was sure of the layout. Easier to tweak. Also, labeling the drops saved me headaches later. 🙂
Great questions, Olivia. For the 240 ft F18240 kit, I’d recommend the 3/4″ K93217 regulator if you plan to run two heavy tools simultaneously or expect higher CFM demand — it reduces pressure drop and keeps the tools happier. The 1/2″ K93216 will work, but you’ll see more restriction under load.
About running it inside walls: aluminum FastPipe is fine in-wall from a corrosion and durability standpoint, but make sure you allow for service access at drop points and avoid long hidden runs without isolation valves. Thermal expansion is less dramatic than with some plastics, but plan a few loops or expansion points if the run is very long.
Long post because I like details:
I bought the Rapidair 90500 1/2 x 100′ AirCompressor Accessories Master Kit for my basement workshop last winter. I wanted something compact, easy to route, and not permanent since I’m renting the space. So far:
– Installation was straightforward — nylon flex was a breeze to bend around studs.
– Flow is fine for a single spray gun and a brad nailer, but I noticed a drop when I tried running a big sander and the compressor together.
– The kit is lightweight and looks tidy, but watch out for accidental punctures if you store stuff against it.
Anyone else using the 90500 long-term? How has it held up to seasonal temps? Also, any tips to prevent kinks where it enters fittings?
I used the 90500 for 3 years in a cold garage. Stiffened a bit in winter but never cracked. The rigid stub trick helped a lot.
Also: keep an eye on the fittings for leaks — nylon push-to-connect fittings are convenient but can loosen if the line shifts. Periodic quick checks save headaches.
If it’s renting and you might move, the nylon kit is perfect. Pro tip: label the ends so you know which goes where when you reinstall at a new place 😅
Thanks for the detailed write-up, Michael — that’s exactly the kind of real-world feedback readers need. Nylon flex kits like the 90500 are great for temporary or renter-friendly installs. For kink prevention, add short rigid stubs (a few inches of aluminum or brass) at transition points to smooth the bend radius, and use clamps to keep the line from being pinched by stored items.
On seasonal temps: nylon can stiffen in very cold conditions, so secure the line well and avoid tight bends that could become stress points in winter.
Loved the breakdown of budget options — I’m on a DIY budget and the M7500 shop air line kit (3/4″) and M3800 (1/2″) look like good choices.
Couple quick practical questions: do I need special adapters to connect these kits to a standard 1″ compressor outlet? Or is it mostly standard NPT fittings and easy to adapt? Also, any common rookie mistakes to avoid when doing the first install? 🙂
Measure twice — plan the drops, then buy a few extra fittings. Also, test pressurize the system and listen for leaks before you mount everything permanently.
Most compressors use NPT thread sizes; you may need a bushing or adapter depending on your compressor’s outlet size. The kits usually include common fittings, but check the compressor outlet thread (often 3/4″ or 1″) and get a reducer/bushing if needed. Rookie mistakes: not planning drop locations (you’ll regret too few drops), overtightening push fittings, and skipping isolation valves at key points.
And one last tip: keep the filter/regulator accessible. People hide them and later curse when they need to change the element or adjust pressure.