

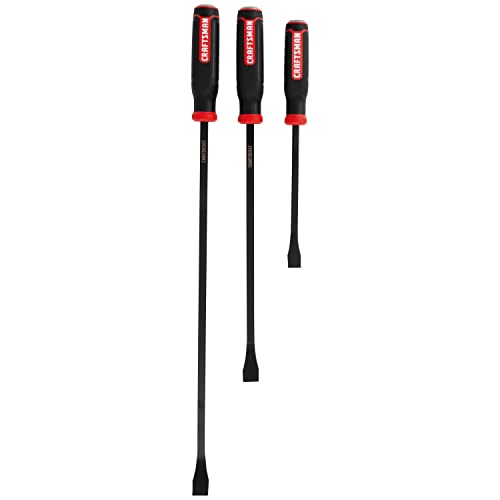
Hello and welcome! If you’re looking to keep your trusty pry bar in top shape for all your projects, this step-by-step guide is here to help. With regular maintenance, you can ensure that your pry bar remains durable and continues to perform at its best. Follow these simple instructions to extend the lifespan of your tool and make your future tasks a breeze.
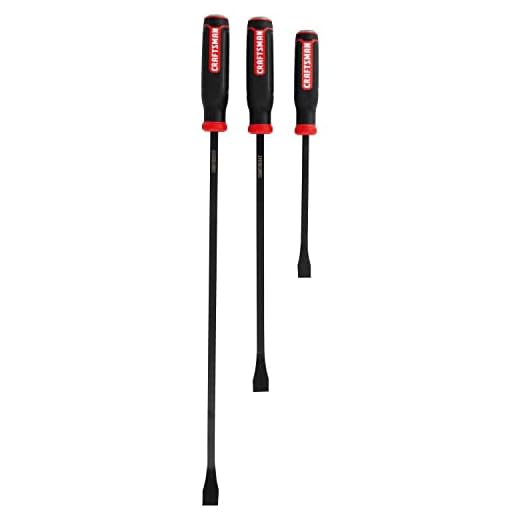


Clean the Pry Bar
After each use, wipe down the pry bar with a clean cloth to remove dirt, debris, and moisture. Prevent rust and corrosion by keeping the pry bar dry and clean. This simple maintenance routine extends the lifespan of your pry bar and ensures optimal performance every time you use it.
Inspect for Damage
- Check the pry bar regularly for any signs of wear, including cracks, bends, or dull edges.
- Replace or repair any damaged parts immediately to ensure safe and effective use.
- Regular inspection will help maintain the pry bar in optimal condition and prevent accidents.
Apply Lubricant
- Apply lubricant: Regularly apply a suitable lubricant to the moving parts of your pry bar.
- Prevent friction and wear: This helps prevent friction between the components, reducing wear and tear on the tool.
- Prolong lifespan: By keeping the moving parts lubricated, you can extend the lifespan of your pry bar and ensure smooth operation.
Store Properly
Store the pry bar in a dry area free from moisture and humidity. Hang it vertically on a hook or pegboard, or lay it flat on a shelf to avoid warping or bending. Ensure the storage space is clean and protected from the elements to maintain the pry bar’s integrity.
Avoid Misuse
- Use the pry bar only for its intended purposes.
- Avoid prying excessively heavy objects or using it as a hammer to prevent damage.
Sharpen Edges
Regularly sharpen the edges of the pry bar using a file or grinder. This maintenance task will help ensure the tool remains effective for prying and lifting. Begin by inspecting the edges for dullness, then securely grip the tool and carefully sharpen each edge to restore its sharpness. After sharpening, test the pry bar on a small task to confirm its improved functionality.
Protect Handles
- Apply a protective coating to the handle of your pry bar.
- Choose a coating that prevents splinters and improves grip comfort.
- Clean the handle thoroughly before applying the coating to ensure proper adhesion.
- Allow the coating to dry completely before using the pry bar to ensure effectiveness.
Check Alignment
Keep the pry bar straight and aligned at all times. A bent tool can lead to inefficiency and increase the risk of accidents. Make sure to check for any bends before using the pry bar and adjust as needed to ensure proper alignment and safety during your tasks.
Periodic Maintenance
Schedule routine maintenance checks for your pry bar to keep it in top condition. Regularly inspect the pry bar for any signs of wear or damage, such as cracks or rust. Address any issues promptly by cleaning, lubricating, or replacing parts as needed to ensure the pry bar remains safe and effective in your work. Regular maintenance will help prolong the life of your tool and maintain its performance.
Seek Professional Help
If unsure about maintenance or repair tasks, consult a professional for assistance to avoid further damage. For example, if you notice a leak in your plumbing but are unsure about fixing it, call a plumber immediately to prevent water damage to your home. Similarly, if your car is making unusual sounds that you can’t identify, take it to a mechanic without delay to prevent any potential breakdowns on the road. Remember, it’s always better to be safe than sorry when it comes to tasks you are unsure about.
Conclusion and Final Tips
Look, maintaining your pry bar isn’t rocket science, but it’s crucial if you want this bad boy to last.
Remember:
- Clean it after every use
- Keep an eye out for damage
- Lube it up regularly
- Store it right
Do this, and your pry bar will be your ride-or-die for years.
Pro tip: Set a reminder on your phone for a quick monthly check-up. It’ll take 5 minutes tops and save you a ton of headaches (and cash) down the road.
Now go forth and pry with confidence, you tool-savvy beast!
Cleaning Supplies

Pry Bar Care Tips
Tips and Techniques for Proper Pry Bar Utilization
- Before using the pry bar, ensure that you are wearing the appropriate safety gear such as gloves and safety goggles to protect yourself from any potential hazards
- Position the pry bar against the object you want to remove or lift, making sure the flat end is securely lodged underneath
- Use a hammer to gently tap the other end of the pry bar to create leverage, gradually increasing the force as needed
- Slowly apply pressure in a steady and controlled manner, using the pry bar to lift or separate the object. Avoid using excessive force to prevent damage
- Once you have successfully removed or lifted the object, carefully release the pressure on the pry bar and store it in a safe place for future use
Pry Bar FAQs
A pry bar and a crowbar are often used interchangeably, but there are some differences between the two. A pry bar is typically smaller and lighter in weight, with a flat and thin blade at one end that is used for leverage. On the other hand, a crowbar is generally larger and heavier, with a curved end that provides greater leverage for lifting and prying. So, while both tools serve similar purposes, the main distinctions lie in their size, weight, and shape.
When looking for a high-quality pry bar, there are several key features you should consider:
- Material: Look for pry bars made of durable materials like hardened steel or titanium for strength and longevity.
- Size and Shape: Consider the length and shape of the pry bar. A longer pry bar provides more leverage, while a tapered shape can help with getting into tight spaces.
- Handle: Opt for a pry bar with a comfortable and ergonomic handle that provides a good grip to prevent slipping during use.
- Nail Puller: Some high-quality pry bars come with a built-in nail puller feature, which can be very convenient for various tasks.
- Weight: A good pry bar should strike a balance between being sturdy and easy to handle. Consider the weight of the pry bar before making a purchase.
By keeping these features in mind, you can choose a high-quality pry bar that meets your needs and withstands heavy use.
The pry bar, also known as a crowbar, has a rich history dating back centuries. Its design and use have evolved over time, originally used as a tool for lifting and prying objects. Pry bars have been made from materials such as iron, steel, and aluminum, with different lengths and shapes for various tasks. Over the years, the pry bar’s design has been refined for better leverage and efficiency, making it an essential tool for construction, demolition, and other projects requiring leverage. Its versatility and effectiveness have made it a staple in many toolboxes around the world.




Appreciate the detailed step-by-step instructions provided in the article.
The section on cleaning rust off a pry bar was particularly informative.
Simple yet effective tips for extending the longevity of a pry bar.
I never thought about checking for loose handles, a potentially dangerous oversight.
An essential tool maintenance guide for anyone who uses a pry bar regularly.
Thank you for stressing the importance of storing the pry bar properly to prevent damage.
Would love to see more articles on tool maintenance like this one.
Great tips on maintaining a pry bar, very useful information!
I have been neglecting my pry bar maintenance, this article was a helpful reminder.
I didn’t know about using lubricating oil on the pivot point, will definitely try that.