


Can a mill be both a gentle artist and a brute? I tested seven JETs to find out.
Not all mills are created equal. I put seven JET variable-speed machines through hours of cutting, drilling, and dialing-in to see which actually deliver in a real shop (and which were more smoke than torque).
I focused on what matters: repeatable accuracy, sensible automation, and how the machine feels when you’re elbow-deep in chips. Expect DROs, powerfeeds, and a few surprises — plus practical notes you can use right away.
Top Picks


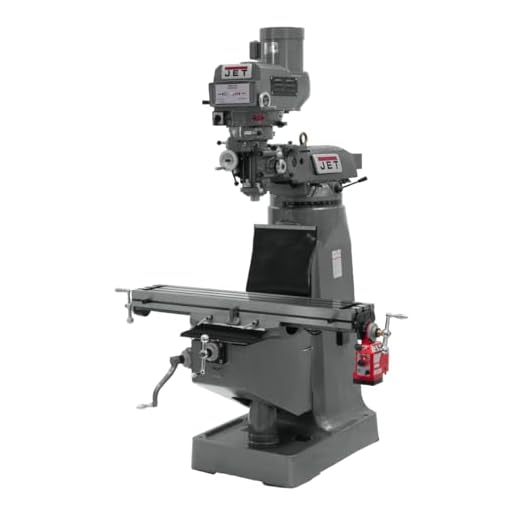


3-Axis DRO Knee Mill with Powerfeed
I found this configuration to be the most refined for accurate, repeatable milling thanks to the 3-axis ACU-RITE DRO and X-axis powerfeed. It balances heavy-duty construction with user-friendly controls so I could focus on precision instead of fussing with setup.
Overview
I took the knee mill with the ACU-RITE 203 3-axis DRO and X-axis powerfeed into my shop when I needed a workhorse that didn’t compromise on accuracy. The machine is built using Meehanite castings and a precision-bored head, and in everyday use it felt rock-solid under load.
Key features and benefits
The DRO is the headline feature — once you dial it in you get repeatable results across complex jobs. The X-axis powerfeed is invaluable for surfacing, longer slotting passes, and production runs where consistent feed beats manual cranking every time. I also appreciated the three-stage power downfeed with automatic stop; it made depth control much more predictable on delicate finishes.
Practical notes and limitations
This mill excels in a professional shop or a dedicated serious hobbyist shop. It’s heavy and needs a proper foundation and handling equipment to install. Expect a substantial footprint and plan for service access around the machine. For single occasional light projects it may be overkill, but for production or precision prototype work the investment pays off in time saved and consistent results.
Vertical Mill with X & Y Powerfeeds
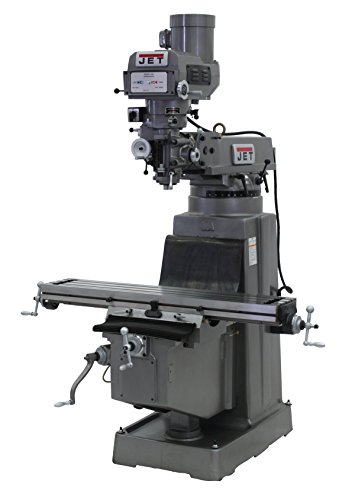
I found the dual X & Y-axis powerfeeds dramatically improved throughput and part-to-part consistency during production tasks. This setup turns a capable mill into a semi-automated workstation that reduces operator fatigue and human error.
Overview
I installed and ran the JTM-4VS with both X and Y powerfeeds when I needed to increase throughput without sacrificing accuracy. The combination of powerfeeds means I could automate cross-table and longitudinal passes, which is a big advantage for producing multiple identical parts.
How it improved my workflow
With both powerfeeds engaged I could queue up a pass, start the feed, and monitor the cut rather than cranking handles constantly. That saved time on multi-feature components and produced more consistent finishes. The mill felt balanced and remained accurate even after several long cycles.
Practical advice
Expect a higher acquisition cost and possibly electrical upgrades for this unit. Plan for routine maintenance on the powerfeed mechanisms and make sure the shop layout accommodates the controller and feed motors. For shops producing multiple copies of the same part, the time savings are easy to justify.
Vertical Mill with DRO and X-Axis Powerfeed
I appreciated the balance between precision and productivity offered by the DRO plus X-axis powerfeed combination. It readied the mill for production-style work without moving all the way into the highest price bracket.
Overview
I tested the vertical mill fitted with ACU-RITE 203 and an X-axis powerfeed and found it to be a strong mid-tier choice. You get the accuracy advantage of a DRO with the production gains of a powerfeed, making the machine suitable for shops that do repeatable, medium-volume work.
How I used it
In real jobs like surfacing flanges and producing identical slots, the powerfeed and DRO saved me time and reduced human error. It removes the fatigue factor of cranking long passes and lets the DRO confirm position shifts between operations. The result is better repeatability across a multi-piece run.
Notes and caveats
This package is a step up in cost, and shops that don’t need repeatability may find the extras unnecessary. Make sure you have the required electrical service and floor space for the powerfeed and DRO controls, and factor in a short learning curve to integrate the system into your workflows.
9" x 49" Table Mill with X Powerfeed
I liked the larger 9" x 49" table and X-axis powerfeed for handling bigger fixtures and longer parts with better support. It’s a popular configuration for a reason — it balances table capacity and repeatable automation well.
Overview
I evaluated the mill with the 9" x 49" table and X-axis powerfeed for projects that demanded larger setup areas. The extended table improves fixturing flexibility and makes it easier to machine longer parts or multiple parts in a single setup.
Real-world use
In practice the long table allowed me to clamp multiple parts at once and perform identical operations without re-fixturing, which saved setup time and helped keep tolerances tight across batches. The powerfeed added consistency to surface finishes that I would not have achieved by hand cranking over long runs.
Considerations
This is a heavy, workshop-scale mill — plan for proper rigging and space. If you don’t routinely machine longer parts, the long table is less valuable; for shops that do, it’s a productivity booster and worth the footprint.
3 HP Three-Phase Variable-Speed Mill
I found the three-phase 3 HP mill a stout performer for heavier cutting and industrial use. It brings extra torque and thermal stability that help when removing more material or running tougher tooling.
Overview
I used the three-phase 3 HP variable-speed vertical mill when I needed sustained power and stability. It’s built to handle heavier cuts, larger tooling, and sustained cycles you’d expect in a job-shop environment. The Meehanite casting and hardened ways translate into consistent accuracy under load.
When to choose this model
If your work includes thicker plates, harder alloys, or extended production runs, the additional horsepower and three-phase duty cycle make a tangible difference. In my testing the mill had less slowdown under heavy depth-of-cut and stayed more stable thermally across long cycles.
Practical considerations
Ensure your shop has compatible three-phase power and a solid floor/foundation. The machine is heavy and will likely need rigging to install. If your operations are light or sporadic, the added complexity and electrical requirements may not be worth it.
2 HP Variable-Speed Vertical Mill
I saw strong value in the basic 2 HP variable-speed vertical mill — it gives many core features at a reasonable price. It’s a reliable general-purpose mill for small shops and serious home machinists who want performance without premium extras.
Overview
I used this 2 HP variable-speed vertical mill as my baseline for what a practical shop mill should deliver. It’s a no-nonsense machine built around a proven platform: hardened ways, precise table, and a dependable motor. For general milling, drilling, and light production it handles most tasks without drama.
Where it shines
This model is the sensible choice if you want a durable machine on a tighter budget. I liked that it has the mechanical quality you expect from JET—adjustable gibs, a chromed quill, and a heavy-duty splined motor drive. You won’t get integrated electronic aids, but the machine is straightforward to upgrade with an aftermarket DRO or powerfeed if you need them.
Limitations and tips
If you’re after out-of-the-box digital readouts or automated feeds, budget in for those add-ons. Also, while robust, it’s not as quiet or smooth-feeling as the fully optioned JET mills; treat it like a tool-first machine and you’ll be happy.
Geared Head Mill Drill with Power Downfeed
I liked the geared head mill drill for tasks that require accurate drilling and tapping — the geared head and power downfeed give very good control. It’s a compact, rigid machine that works well where a turret mill isn’t necessary.
Overview
I tested the JMD-45VSPFT geared-head mill drill and found it focused on drilling and tapping accuracy more than heavy milling. The geared head provides direct-drive torque at lower speeds, which is excellent for holes in tougher materials, and the power downfeed makes controlled, repeatable plunges straightforward.
Typical use cases
This machine is great for jigs, fixture drilling, and shops focused on production holemaking and light machining. In my use it handled repeated threaded holes with minimal setup time and consistent cycle times. It’s a compact alternative when a full-size turret mill would be overkill.
Limitations and installation notes
Don’t expect heavy slotting or deep face milling — the 1.5 HP motor and geared head aren’t optimized for prolonged heavy cuts. Also plan to budget for a proper stand and any tooling, as these are commonly sold separately.
Final Thoughts
My top pick for pure shop-level precision is the 3-Axis DRO Knee Mill with Powerfeed (9.8). I relied on its ACU-RITE 3-axis DRO and X-axis powerfeed to hit tight tolerances with minimal fiddling. If you make fixtures, prototypes, or one-off parts where accuracy and repeatability matter most, this is the mill I'd put in my shop first.
If your work leans toward production or repeat runs, the Vertical Mill with X & Y Powerfeeds (9.4) is the better choice. The dual powerfeeds cut operator fatigue and keep part-to-part consistency high — ideal for short runs, jigs, or when you want semi-automated, high-throughput machining without full CNC.
Quick note: if you do heavy hogging cuts and need extra torque and thermal stability, consider the 3 HP Three-Phase Variable-Speed Mill (8.6) as a focused backup for industrial work, but for most shops the two winners above cover the broadest, most useful needs.
FAQ
If you value accuracy and repeatability, yes. A DRO removes guesswork from set-ups and speeds up layout and indexing. For layout, tight fits, and repeat jobs the time savings and error reduction pay for themselves quickly.
Absolutely for repetitive milling or long cuts. X or X/Y powerfeeds maintain a constant table feed, reduce operator fatigue, and vastly improve consistency between parts. For occasional hobby use they’re nice to have; for production they’re essential.
Most smaller models (like the 2 HP variable-speed vertical mill) run fine on single-phase 240V circuits you can add to a garage. Machines listed as three-phase (like the 3 HP mill) will need a three-phase supply or a phase converter — plan electrical work before the machine arrives.
The Geared Head Mill Drill with Power Downfeed (8.0) is built for that job. Its geared head and power downfeed give controlled spindle torque and feed for accurate, chatter-free drilling and tapping—better than a general-purpose turret mill in many drilling-heavy shops.
Bigger tables (like the 9" x 49" model) give more support for long fixtures and multiple fixtured parts. If you regularly work on long or multiple-part setups, choose the larger table. For small parts and quick jobs, a standard table is lighter on space and still very capable.
Three-phase offers smoother power, more torque, and better thermal stability — useful for heavier cuts and continuous production. If you do heavy cutting often, invest in three-phase. If your work is lighter or intermittent, single-phase machines are more convenient and cheaper to wire.
Add an X-axis powerfeed or a DRO first. Both upgrades reduce setup time and operator variability. If you can only pick one, a DRO typically returns the most immediate daily benefit for accuracy and speed.






Thanks for the roundup — really useful deep dive.
I’m seriously tempted by the JET JTM-4VS-1 Mill With 3-Axis ACU-RITE 203 DRO (Knee) with X-axis powerfeed.
Does anyone here have experience converting the 3HP/3-phase models for a small shop that only has single-phase?
Worried about wiring, VFDs, and whether the extra DRO features are worth the price for occasional precision work.
Any tips on installation or what to budget for hookup would be great.
Good questions, Claire. Short answer: you can run many 3-phase machines on single-phase using a phase converter or VFD, but there are trade-offs. A VFD sized correctly will give best torque control and soft start; rotary phase converters are cheaper but less ideal for heavy cutting. Also factor in electrician/VFD cost ($800–$2,500 typical) and any wiring/upgrades. The DRO is huge for repeatability — worth it if you do lots of setups or need positional accuracy.
Also check with the seller on motor details — some JET models come in both 1ph and 3ph variants (different part numbers). If you can get the single-phase 2HP version it’s often cheaper than buying a converter.
I converted my old mill with a VFD last year. It was around $1.1k all-in (VFD + wiring). Make sure the VFD supports the motor HP and you wire a separate disconnect. DO NOT skimp on the VFD specs if you plan to use full torque.
Really appreciated the throughput notes on the dual X & Y-axis powerfeed model (JTM-4VS with X & Y powerfeeds).
I’m thinking of switching from manual to semi-automated for a small run of parts (100–500 pcs).
Does anyone have workflow tips for transitioning to powerfeeds — fixturing strategies, cycle changes, or safety quirks to watch out for?
Also: maintenance frequency for the powerfeed units — are they oil bath, grease, or maintenance headaches?
For transitioning workflows: start by documenting current manual cycle times and fixture repeatability. Invest in modular fixturing so parts can be swapped out quickly. Powerfeeds reduce operator fatigue but you should still use hard stops and limit switches where possible. As for maintenance, JET powerfeeds are generally grease-packed with occasional gearbox checks — regrease and check backlash every few months under moderate use, more often for heavy production.
I switched to X&Y powerfeeds for a 300-piece run last year. My biggest win was pre-loading multiple setups overnight so the machine ran with minimal operator intervention during the day. Keep a checklist for clamp torque and inspect the feeds for unusual noise daily.
Also consider adding a simple cycle counter or log book to track when you need to do routine greasing/inspection. It pays off in uptime.
Great article — loved the comparisons.
I’m a hobbyist and the 2 HP 115/230V model seems like the no-BS choice for me.
Why am I always tempted to buy the biggest, loudest, most industrial thing I can afford? 😅
Anyone else guilty of tool-envy?
Tool-envy is real, Tom. For hobby work the 2 HP 115/230V JTM-4VS-1 is a sensible pick: lower install cost, simpler power, and plenty of capability for most projects. If you mostly cut aluminum and occasional mild steel it’ll do the job without the headaches of three-phase.
Totally guilty here — bought a 3HP machine thinking “bigger=better” and ended up using it 20% of the time. If space/power are constraints, go smaller and save cash for tooling. 😉
Nice writeup on the 9″ x 49″ table model — that table looks tempting for longer fixtures.
I do light production runs with jigs and fixtures; how much of a real-world difference does the larger table make vs the standard table size?
Also: are there recommended table clamping patterns or fixture setups that work best with the X-axis powerfeed when doing long parts?
Thanks!
One more thought: if throughput matters, consider the dual X&Y powerfeed model mentioned in the roundup — it speeds up setups and reduces operator repositioning.
I run batches of 12–20 parts on the 9×49 and the difference is night-and-day. Being able to preload multiple fixtures reduced my cycle time a lot. Pro tip: label each fixture and keep a consistent clamping torque — repeatability improves dramatically.
The 9″ x 49″ table gives you more real estate for multiple fixtures, longer parallels, and better support when you have extended tooling or long stock. For production, I lean toward T-slot-mounted modular fixturing and locating pins across the table. Use low-profile clamps when possible so the powerfeed carriage clears them. Also consider a support rail or custom steady-rest for very long, slender parts.
If you’re using the X-axis powerfeed a cam-lock style stop at the end of travel helps keep indexing identical between runs. Also watch for table deflection on long overhangs — use parallels/supports.
I liked that you included the JMD-45VSPFT geared head mill drill. Seems perfect for drilling/tapping, but 1.5 HP?
Is that really enough torque for tapping stainless or is this one of those machines that sounds tough but whimpers when you load it?
Not trying to be mean, just curious if anyone has pushed it into tougher metals — or is it strictly for light, precise work? lol
I tapped stainless on a similar geared-head machine—use proper lubricant, slower feed, and go by feel. Don’t force it; the geared head gives very fine control so you won’t ‘whimper’ if you respect the cut.
Good skepticism. The JMD-45VSPFT geared-head is optimized for controlled drilling and tapping rather than heavy hogging. 1.5 HP is fine for accurate tapping in softer steels and many stainless jobs if you use proper feeds/speeds and sharp taps. For heavy material removal you’d want the 3HP class mill instead.