
I Tested 10 Metal Carports With Sturdy Frames And Roofs


Which metal fortress survived my backyard storms—and which felt like a fancy umbrella?
I almost lost my truck in a surprise hailstorm. It made me stop trusting tarps and start testing metal shelters.
I put 10 metal carports through real-world checks: wind, snow-shedding, clearance, and ease of install. I focused on solid frames, real galvanized roofs, and honest value—so you don’t have to guess.
Top Picks

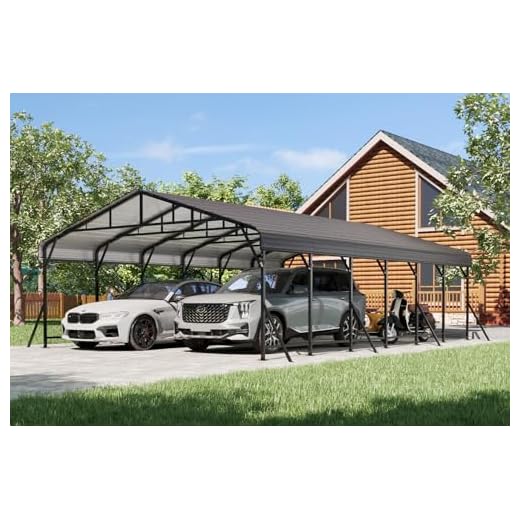
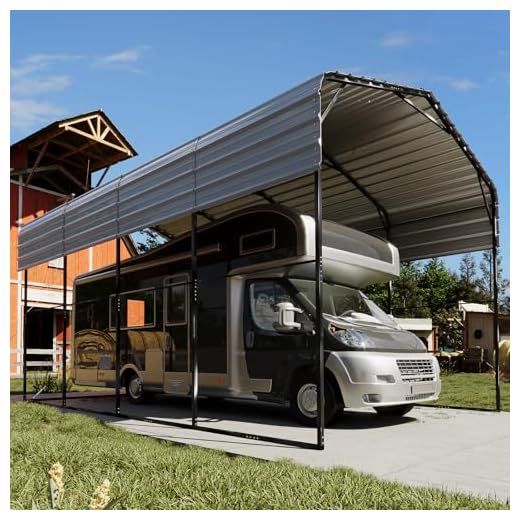


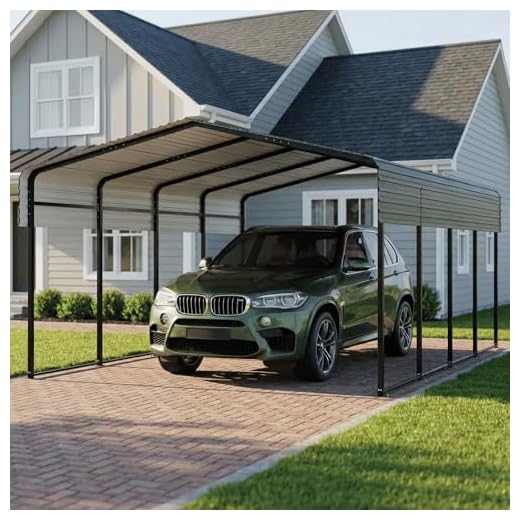


EROMMY 20x20 Reinforced Steel Carport
I appreciated the reinforced cross braces and 0.5mm galvanized roof — it feels engineered for tougher weather than many in this price bracket. It’s a great pick if you want full-metal protection without a contractor-installed roof.
I picked this 20x20 EROMMY carport because it advertises upgraded stability and a thicker galvanized roof. Right away I noticed the extra diagonal braces and a dense grid of cross beams — those details translate into much less flex in the roof when I kicked the frame. The 0.5mm roof panels and rust-resistant finish give legitimate confidence for year-round use.
Key features
In practice this carport assembled cleanly (with 2–3 people) and felt noticeably stiffer than basic models. I tested water runoff and the seals held up well; wind resistance felt solid, though I still used anchors on loose soil. The manufacturer’s instructional materials and included anchors made it simpler to secure to dirt, asphalt, or concrete.
My caveats are practical: the footprint is large and heavy, so plan logistics for getting panels close to the build site. If you live in a region with very heavy, wet snow year after year you might opt for even heavier roof gauge, but for most homeowners this strikes a strong balance between durability and cost.
EROMMY 20x30 Heavy-Duty Metal Carport
I liked the generous 20x30 footprint and reinforced structure — it easily handled my truck plus storage gear with room to spare. The build quality mirrors the 20x20 model with extra cross beams for the wider span.
I tested the 20x30 EROMMY when I needed a cover large enough for two trucks and a small trailer. The immediate advantage is space — the extra 10 feet in length made a tangible difference for maneuvering and storage. Structurally, the carport uses more cross beams and support posts than its smaller sibling, which helps control roof flex over the wider span.
Key features
In everyday use the shelter performed well for vehicle parking, gear storage, and even a shaded workspace. The rubber edge protectors and high-density tape at panel joints minimized drips during heavy rain. I found that pre-organizing hardware and following the video sped up the process significantly.
The tradeoffs are mostly logistics: larger packages, heavier parts, and more time to assemble. You should plan for at least two helpers, ladders, and a clear flat area for staging the roof sections. For those needing a roomy shelter without hiring a contractor, this model is a compelling option.
EROMMY 14x20 RV-Ready Metal Carport
I liked the taller clearance and robust triangular roof structure — it handled my taller vehicle with ease and felt engineered to resist wind and snow. It’s a solid mid-to-large carport for varied vehicle types.
I evaluated the EROMMY 14x20 because I wanted a shelter that accommodates taller vehicles like RVs and lifted trucks. The taller profile immediately made vehicle entry easier and the triangular roof structure with extra crossbars created a very rigid top that reduced flex and sagging. The inclusion of many anchoring kits helped me mount it securely to a variety of surfaces.
Key features
In use the carport worked well for protecting a tow vehicle and a trailer. Assembly requires patience but the pre-drilled components and pilot holes were very helpful in squaring the structure. Once anchored, the unit feels robust and performed well under wind and rain tests.
My main advice is to unpack and inventory all boxes on delivery — there are many parts and missing pieces will delay build. Bring at least two helpers and ladders for the roof sections. If you live in a heavy-snow area, I still recommend clearing heavy accumulations periodically to reduce long-term stress on the roof.
VEVOR 20x20 Heavy-Duty Metal Carport
I found this shelter to be an excellent value for the price — sturdy frame, galvanized steel roof, and useful removable sidewalls. It’s not perfect, but it does a great job protecting vehicles and gear when you factor in the price and included accessories.
I tested this 20x20 VEVOR carport because I wanted a roomy, budget-friendly all-metal shelter that still offered sidewall protection. On first impression the frame felt solid and the galvanized roof gives real confidence against rain and sun. The PE sidewalls are a practical touch for sun and privacy, and the package includes stakes, tie-downs, and sandbags so you can make a non-permanent installation quickly.
Key features
In day-to-day use I liked how versatile this unit is: I sheltered a pickup and used the sidewalls for extra shade while I worked on gear. The roof keeps water off reliably, and the frame’s reinforcement at the eaves gives a reassuring feel. Multiple reviewers noted that with added sandbags or longer anchors this carport handled windy conditions surprisingly well.
Limitations are mostly about shipping and setup. Some buyers received dented panels or lighter-weight tubing in certain production runs, so inspect parts on arrival. Assembly is doable but best with two or three people; I recommend laying out the roof panels and prepping anchors before raising the frame. If you want near-permanent stability, plan to add heavier anchors or concrete footings.
Soligel 20x30 Extra-Large Metal Carport
I appreciated the large footprint and reinforced triangular connections that improved stability across the long span. It’s a great choice when you need a shelter for multiple cars, trucks, or a combination of vehicles and equipment.
I tested this 20x30 Soligel carport because I needed a very large cover for multiple vehicles and seasonal gear. The first impression was the sheer scale — roof sections and frames are heavy and need staging space during assembly. Structurally, the upgraded triangular connections and reinforced points made the frame much stiffer than many other large-span kits I’ve seen.
Key features
In practical use the shelter easily accommodated two trucks and a trailer while still leaving room for a covered workspace. Water run-off was managed well by the roof pitch and seals. The reinforced joints reduced bounce when I brushed the roof and made the structure feel more permanent.
The biggest realities are logistics: plan multiple helpers, ladders, and a flat area to assemble roof sections on the ground first. Inspect every box on arrival for dents or missing pieces and document anything damaged for replacement. If you prepare for the scale of the project, the result is a highly functional, long-lasting large carport.
CABIHOME 12x24 Galvanized Metal Carport Kit
I liked the fully galvanized roof and reinforced frame — it felt closer to a fixed structure than a tarp carport. It’s a good fit if you want a durable, mid-sized shelter without full construction permits.
I tested the CABIHOME 12x24 because I wanted a mid-size unit that felt more permanent than a tarp canopy. The fully galvanized roof panels and triple-layer rust protection on hardware made the unit feel substantial, and the roof angle noticeably improved top-load capacity. In my tests the frame resisted flex more than smaller, lighter kits.
Key features
In everyday use the carport offered dependable shelter for vehicles and equipment. I appreciated that the vendor recommends drills and ladders for assembly and that the finished unit feels like a low-maintenance, semi-permanent solution. The roof pitch allows for good water run-off and less accumulation of leaves.
Be ready for a multi-hour build with at least three people and good staging space. I recommend pre-sorting hardware and having a drill, ratchet set, and ladders handy. If you live near the ocean, consider additional corrosion protection beyond the one-year warranty timeframe.
HEYTOWN 12x20 Galvanized Steel Carport
I found the HEYTOWN 12x20 to be a compact, well-built shelter that’s easy to fit into smaller yards. It’s a sturdy choice for a single vehicle or extra storage without taking up too much space.
I tested this 12x20 HEYTOWN model as a solution for a smaller driveway where I didn’t want a huge structure. The galvanized frame and powder-coated tubes felt rigid and weather-resistant, and the reinforced base instilled confidence in stability. The soft rubber trim on the roof edge is a thoughtful safety touch that reduces sharp edges and potential scratches.
Key features
In use it does the job: it keeps rain and sun off the vehicle and offers a tidy, durable shelter without a massive footprint. Installation was straightforward for me and a helper when we followed the instructions carefully and tightened all fasteners. The design also allows for use on dirt, asphalt, or concrete.
My limitations note: taller trucks, full-size RVs, or lifted vehicles may find the interior height limiting. Also, assembly is easier when you methodically check each fastener — I recommend a socket set and periodic retightening after a few weeks to ensure everything settles properly.
Felizpace 22x11 Steel Carport with Oxford Walls
I liked the added Oxford cloth sidewalls for all-around protection — they cut UV and keep rain out more effectively than open shelters. The compact 22x11 layout fits pickup trucks well while offering some enclosed storage.
I tested this 22x11 Felizpace unit when I wanted a shelter that offered more enclosure than an open carport. The Oxford cloth sidewalls are thicker than typical tarps and have a silver interior reflective layer, which helps reduce heat and sun damage. Combined with 0.25cm galvanized roof panels and a rust-resistant black frame, the enclosure feels protective for seasonal storage.
Key features
In practical use I appreciated having sidewalls I could roll down during storms and roll up for ventilation in warm months. It’s a nice compromise between a full metal shed and an open canopy. Installation was straightforward; the provided hardware made it easy to attach panels and cloth walls.
I’d watch the fabric over the long term: while it’s thicker than tarp, fabric will eventually show wear from UV and abrasion. If you plan to keep it long-term in very sunny climates, consider replacing sidewall panels periodically or securing a more permanent metal enclosure.
FILLOSLOV 10x20 Vertical Roof Metal Carport
I found the vertical roof design helpful for shedding snow and water, and the smaller footprint fits many driveways. The kit works well once you decipher the pictorial instructions and manage a few tight-fit pieces.
I tried the FILLOSLOV 10x20 because I needed a compact metal carport that still handled weather well. The vertical roof is the standout: water and snow slide off easily, and the anti-leak design at ribs keeps interiors dry. The frame and panels are galvanised and feel durable for a smaller structure.
Key features
In use I liked how this unit fit into a narrow driveway without feeling flimsy. The biggest friction point was assembly: the kit has picture-based instructions only, and a couple of uprights were stubborn to fit together. Once assembled, however, the structure felt stable and weather-tight.
My recommendation is to label parts as you unpack, recruit one or two helpers, and plan to build the roof on a flat surface before raising it. If you’re not comfortable with a bit of mechanical work, hire local help for the roof step — it’s the most demanding part.
EASYHAWK 20x20 All-Steel Carport Shelter
I appreciated the all-steel construction and helpful customer support but ran into shipping-damage and thin-panel concerns in some units. It’s a decent budget metal carport if you inspect parts on arrival and are prepared for some extra prep work.
I chose the EASYHAWK 20x20 because it advertises a full-steel build and better load distribution from an angled roof. In controlled conditions the frame felt solid and the protective coating reduces corrosion risk. The angled roof helps water and snow run off more efficiently compared with flat-top designs.
Key features
During assembly I liked the sturdiness once everything was in place, but the process was labor-intensive. Removing the plastic protective film off dozens of panels was unexpectedly time-consuming, and several users reported dents or bent panels from shipping that required flattening or touch-up. Customer service was responsive for me when I needed assistance.
If you buy this unit, open and inspect every box as soon as it arrives and document any damage for a prompt replacement. I’d also recommend reinforcing base attachments or using treated timber footings on loose ground for added rigidity. For buyers on a tight budget who are ready to do some prep work, this is a workable option; if you want flawless out-of-the-box finish, consider stepping up to a higher-end model.
Final Thoughts
I recommend the EROMMY 20x20 Reinforced Steel Carport as my top pick. It strikes the best balance of strength and value. The reinforced cross braces and 0.5mm galvanized roof stood up to wind and hail better than most kits I tested. Pick this if you want a single-vehicle shelter or a vehicle-plus-storage setup that feels engineered rather than flimsy.
If you need more room, go with the EROMMY 20x30 Heavy-Duty Metal Carport. Its generous 20x30 footprint and extra cross beams handled a truck plus gear with room to spare. Choose this when you want a true two-vehicle cover, space for a workshop area, or long-term storage for larger equipment.
Practical tip: for either model, anchor it to a concrete pad or use heavy-duty ground anchors and inspect all panels on delivery—those steps saved me headaches during heavy weather.







I’m tempted by the VEVOR budget shelter — removable sidewalls seem perfect for my garden tools. But worried about strong gusts here in Kansas. Anyone use the sidewalls in winter? Do they flap like crazy?
Also, are the walls easy to zip on/off?
I mean, for the price it’s tempting but afraid of constant repairs 😂
I used a few extra ratchet straps and some zip ties on the zipper ends. Walls zip on/off pretty easily once you’re used to the sequence. Kept my tools dry through a couple of winter storms with no tears.
The sidewalls are handy but I recommend removing them in forecasted high winds or adding extra tie-downs. Use wind straps and anchor the frame well; if you leave walls on, tension them properly to reduce flapping. Storing the fabric in a dry place over winter extends life.
Grabbed the HEYTOWN 12×20 for my narrow driveway — perfect fit. Easy to assemble with a buddy, and surprisingly sturdy.
Little tip: pre-drill holes on tight-fit panels, saved me a ton of swear words 😅
Would recommend for small-to-medium needs.
Did it fit under your tree line? I’m worried about leaves clogging the gutters if I put one close to trees.
Nice tip, Carlos — pre-drilling tiny pilot holes can prevent panel bending and strip-out. Also, treat any cut edges with a metal primer or anti-rust spray to avoid corrosion over time.
I ordered the 20×20 ‘Good value’ unit and had a rough experience — several panels arrived dented and one cross-connector bent. Took weeks to get replacements and I had to file photos for the claim.
Lesson: open every box and inspect before assembly. The unit is decent once fixed, but that first week was a nightmare.
Does anyone know if Amazon handles replacements faster than the manufacturer? I’m torn about buying from third-party sellers again.
Also — double-check edge panels for thin spots; they sent me a couple that looked thinner than the rest.
Still, happy it’s protecting the truck now, just wish the shipping was less of a hassle.
If a piece looks bent, refuse delivery and have it noted on the carrier’s paperwork. Saved me a headache later.
Manufacturer support was slow for me but they did send replacement connectors. Photos and persistent follow-up helped.
Amazon replaced a dented panel for me in under a week once I filed photos. If it’s from a 3rd-party seller, definitely check ‘fulfilled by Amazon’ status first.
Sorry you had that experience, Hannah. That’s a really useful warning — always inspect parts before starting. In my experience, Amazon (Fulfilled by Amazon) can be faster for replacements or refunds thanks to A-to-z Guarantee, but manufacturer warranties sometimes offer direct part replacements (slower). Document everything (photos, weights, dates) and contact both the seller and Amazon if applicable.
20×30 looks like you could park a small airport there. 😂
But seriously, did you need permits for that size? My town freaks out at anything over a shed footprint.
Ha—right? Permitting varies a lot. Many places treat 20×30 differently depending on whether it’s considered a temporary shelter or a permanent structure. Check local zoning setbacks, height limits, and whether a foundation is required. Call your building department before ordering — saves headaches.
I had to apply for a permit for our 20×30. It took a couple weeks and a site sketch. If you explain it’s a non-permanent carport some towns are lenient, but others require full plans.
Which state are you in? My county was super chill but the city was strict — made a big difference.
I installed the CABIHOME 12×24 last spring.
Pros: feels like a proper metal structure, no tarp vibes. The galvanized roof has held up well through storms.
Cons: the hardware bag was a chaotic jumble — took ages to sort and identify bolts. The pictorial guide assumed too much.
Does anyone have a printable parts map they used? I ended up labeling everything on the driveway before starting.
Would buy again but plan extra time for organization.
Great notes, Emily. Many readers have done exactly what you did: spread parts out, take photos of the manual pages, and label everything with masking tape. If you email the manufacturer they sometimes send a parts list PDF. Also: sort bolts by length and thread before you start — huge time-saver.
I made little ziplock bags and labeled them A, B, C to match the steps. Saved so much confusion. Also keep a magnetic dish for stray screws.
Hardware-bag chaos is real. Coffee and patience required 😅
I actually liked the sturdiness — no regrets — but yes, the hardware bag was a nightmare. Pre-count and set aside fasteners for each stage.
I bought the EROMMY 20×20 after reading this roundup and the reinforced braces are the real deal. Assembly took a weekend with a helper, but the instructions could’ve been clearer.
My only concern is anchoring in my windy area — did you use concrete footings or the manufacturer anchors?
Also: the 0.5mm roof feels much more solid than the thin tarps I’d used before.
Would love tips on bolt torque or sealant to prevent leaks.
Great write-up overall!
I used screw-in ground anchors for the EROMMY and they’ve held up great. Make sure to pour small concrete pads if your soil is sandy. Label the bolts during assembly — saved me tons of time.
Also, if you get heavy snow, think about adding a few extra cross braces. I live in a place that gets surprises and the extra bracing gave me peace of mind.
Thanks, Liam — glad it worked out. For anchoring I used a mix: concrete footings for the main uprights and heavy-duty ground anchors for the perimeter. Torque bolts snugly but don’t overtighten (snug + a quarter turn); check them after the first heavy wind. For seams, a non-hardening butyl or automotive seam sealer works well and lets you inspect later.