


In this step-by-step guide, we understand the frustration of a torn heavy-duty tool bag compromising the safety of your valuable tools. We aim to help you through the process of repairing the tear effectively, ensuring your equipment is securely stored and ready for use. By following our instructions, you can extend the life of your heavy-duty tool bag and keep your tools organized and protected.


Assess the Damage
Inspect the torn heavy-duty tool bag to determine the extent of the damage.
- Locate the Tear: Start by identifying the size and location of the tear on the tool bag.
- Examine the Surrounding Areas: Check for any additional damage around the tear that may need to be addressed.
- Assess the Severity: Determine how extensive the tear is and whether it can be repaired or if a replacement is necessary.
Once you have inspected the tear:
- Plan for Repair: Based on the size and location of the damage, decide on the best approach for repairing the torn heavy-duty tool bag.
- Consider Repair Options: Research suitable repair methods or products that are appropriate for the type of material the tool bag is made from.
- Prepare Repair Materials: Gather the necessary tools and materials needed to mend the tear in the heavy-duty tool bag effectively.
Gather Materials
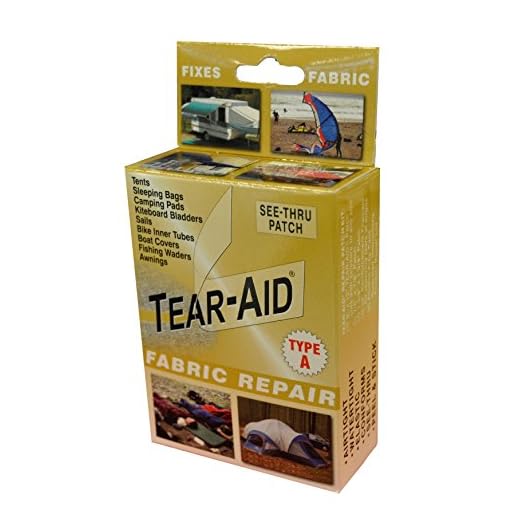
Gather the necessary materials for the repair. Make sure you have heavy-duty fabric patches, fabric glue, scissors, and a clean cloth ready. These are essential items for effectively fixing the tear or hole in your fabric. It’s important to have all these materials on hand before you start the repair process to avoid any interruptions.
Ensure you have a well-ventilated area for the repair work. Proper ventilation is crucial when working with fabric glue to prevent inhaling fumes. Choose a space with good airflow, such as near an open window or use a fan to circulate air. Having a well-ventilated area not only keeps you safe but also helps the glue dry properly. So, set up your workspace in a location that allows for adequate ventilation before you begin the repair.
Prepare the Area
Clean the torn area of the heavy-duty tool bag thoroughly with a clean cloth. Wipe away any debris or dirt to ensure a clean surface for the repair. Make sure the area is completely dry before moving on to the next step.
Inspect the cleaned area carefully for any remaining particles or residue. Use a damp cloth if necessary to remove any stubborn dirt. Ensure the surface is entirely free of any contaminants before starting the repair process.
Apply the Patch
Cut a fabric patch slightly larger than the tear. Apply fabric glue to the patch and carefully place it over the torn area, pressing firmly to ensure adhesion. Make sure the patch covers the tear completely. Press down along the edges to ensure a secure bond. Avoid shifting the patch once you place it to prevent any misalignment or bunching.
Allow the glue to dry as per the manufacturer’s instructions. Typically, this can take anywhere from thirty minutes to a few hours, so be patient. Avoid moving the fabric during the drying process to prevent the patch from coming loose. Once the glue has fully dried, gently tug on the edges of the patch to ensure it is securely attached. Your fabric should now be repaired and ready to use again.
Reinforce if Necessary
Apply a second patch to strengthen the tool bag. Assess the tear’s size and location. For large tears or those in high-stress regions, consider adding a second patch on the inside. Ensure the area is clean and dry before proceeding.
Place the second patch on the inside of the tool bag, aligning it with the tear. Press firmly to secure it in place. Smooth out any wrinkles or air bubbles. Allow adequate drying time before using the tool bag to ensure the patch adheres properly. Additional reinforcement will enhance the bag’s durability and prevent future tears.
Restoring Functionality and Durability
In conclusion, by following the steps outlined in this guide, you can successfully repair a torn heavy-duty tool bag and ensure the security of your tools. Remember that regular maintenance and prompt repairs are key to extending the life of your tool bag. Keep your tools organized and safe for your next project!
Tools Needed
Restoring Tool Bag Integrity
How to Properly Organize and Carry Your Heavy-duty Tool Bag
- Pack your heavy-duty tool bag with essential tools you will need for your project, such as hammers, screwdrivers, wrenches, pliers, and measuring tape
- Make sure the tools are organized in the bag so you can easily find what you need when you need it
- When carrying the heavy-duty tool bag, use the padded shoulder strap or handles for comfortable transportation
- Keep your heavy-duty tool bag clean and free from dirt and debris to ensure your tools stay in good condition for longer
- Store your heavy-duty tool bag in a dry and cool place when not in use to prevent rust and damage to your tools
Frequently Asked Questions (FAQs) about Heavy-Duty Tool Bags
Yes, the tool bag does have a reinforced bottom for added durability. This feature helps protect the bag from wear and tear when placed on hard surfaces or when carrying heavy tools.
Yes, the tool bag does come with a shoulder strap for easy carrying.
Yes, many tools and accessories come with external attachment points for additional add-ons. This feature allows you to customize and expand your toolkit as needed, maximizing your efficiency and productivity. Be sure to check the specifications of the specific tool or accessory you’re interested in to see if it offers external attachment points for extra add-ons.
Yes, tool bags can be easily cleaned and maintained. You can typically wipe them down with a damp cloth to remove dirt and dust. For more stubborn stains, you can spot clean with mild soap and water. Regular maintenance, such as checking for wear and tear on the seams and handles, can help prolong the life of your tool bag.
Yes, the tool bag is suitable for both professional and DIY use. Its durable construction and smart design make it a versatile and practical choice for various tasks and projects. The tool bag offers ample storage space, organization pockets, and sturdy handles, making it convenient for professionals on the job and DIY enthusiasts working on projects around the house. Its versatility and functionality cater to a wide range of users, whether you’re a professional tradesperson or a hobbyist tackling home improvement tasks.
Yes, some products come with additional features such as reflective strips for added visibility. These reflective strips can help increase your visibility and safety, especially if you are active during low light conditions. You may want to check the product description or labels to see if the item you are interested in has this feature.
The heavy-duty tool bag is typically made of durable materials such as canvas, polyester, or nylon to withstand the weight and wear and tear of various tools and equipment.
Yes, the tool bag is water-resistant. It is designed to protect your tools from splashes or light rain. However, it is not fully waterproof, so it may not protect your tools in heavy rain or if submerged in water. Remember to always dry your tools and the bag properly after exposure to any moisture to prevent rust or damage.
If you’re asking about warranty or guarantee offers on the tool bag, it’s best to check directly with the manufacturer or retailer. Warranty terms can vary between products and brands, so it’s important to review the product information or contact customer service to get accurate information on any available warranties or guarantees for the specific tool bag you’re interested in.
The tool bag is available in black, blue, and red color options.
Yes, the tool bag can accommodate larger tools such as hammers or saws. The dimensions and specifications of the tool bag would indicate whether it has enough space and compartments to fit these larger tools comfortably without causing any damage to the bag or the tools themselves.
The dimensions of the tool bag are 18 inches in length, 9 inches in width, and 10 inches in height.
The tool bag has a total of 12 compartments or pockets.
The tool bag features a zipper closure mechanism. This is the primary method used to secure and close the tool bag.
Yes, the tool bag is designed to withstand heavy loads. It is made from durable materials and reinforced with strong stitching to ensure it can carry a significant amount of weight without breaking or tearing. This makes it a reliable option for carrying all your tools safely and securely.






I’m curious about alternative methods for patching torn tool bags. Are there any innovative techniques or materials that could be used for a repair like this?
There are indeed alternative methods for patching torn tool bags. Some people opt for sewing patches using heavy-duty thread for added strength. Others use heat-activated patches or even specialized tapes designed for heavy-duty repairs. Experimenting with different materials can lead to creative solutions.
Would using a specific type of adhesive help in making the patch more durable? I’m wondering if there are any recommendations for adhesive brands that work well with heavy-duty materials like the tool bag.
Using a high-quality adhesive can indeed improve the durability of the patch. Brands like Gorilla Glue or Shoe Goo are known for their strength and flexibility, making them suitable for heavy-duty repairs. Make sure to follow the manufacturer’s instructions for best results.
Thank you for sharing your experience! We’re glad to hear that the guide helped you with your repair. If you have any further questions or need more assistance, feel free to reach out.
Could you provide some tips on preventing tears in heavy-duty tool bags in the future? Maybe some maintenance practices or ways to reinforce weak spots preemptively?
Great question! To prevent tears, regularly inspect your tool bag for wear and tear. Reinforcing stress points with extra material or patches can help strengthen weak spots. Additionally, avoiding overloading the bag and storing sharp tools properly can extend its lifespan.
What kind of tools would be recommended for preparing the area before applying the patch? Are there any specific tools or techniques that can ensure a clean and effective repair?
When preparing the area for the patch, tools like scissors, a utility knife, or sandpaper can be useful for trimming edges and smoothing the surface. Make sure to clean the area thoroughly before applying the patch to ensure proper adhesion. Working in a well-lit area can also help you see any imperfections that need attention.
I recently had to repair my heavy-duty tool bag after it got torn during a project. This guide was very helpful in walking me through the steps to assess the damage and apply the patch. The reinforcement step was crucial to ensure the repair lasts. Thank you for the detailed instructions!
I have followed the guide step by step, but I’m still experiencing issues with the patch staying in place. It seems to peel off after some use. Any suggestions on how to improve the adhesion and make the repair more long-lasting?
If the patch is not staying in place, ensure that the surface is clean and dry before applying the adhesive. Applying pressure to the patch after sticking it on and allowing it to cure fully can improve adhesion. You may also consider using a stronger adhesive or adding additional stitching around the patch for extra reinforcement.