

This step-by-step guide provides instructions on cleaning a durable tool belt to keep it well-maintained and prolong its lifespan. The guide outlines the necessary steps and materials needed to ensure a thorough cleaning process for your essential tool belt.


Gather the necessary materials
Collect the following materials to clean your tool belt effectively:
- Mild Detergent: Grab a bottle of mild detergent your belt clean.
- Soft Brush or Cloth: Ensure you have a soft brush or cloth to gently scrub and wipe the surface of your tool belt without causing damage.
- Lukewarm Water: Fill a bucket or basin with lukewarm water that will help loosen dirt and grime from the belt.
- Well-ventilated Space: Find a well-ventilated area, such as outdoors or near an open window, to ensure proper ventilation while you clean the tool belt. This will help in the drying process and prevent the buildup of fumes from the detergent. Remember, a well-ventilated space will ensure a pleasant and safe cleaning experience.
Remove tools and debris
Empty all tools and debris from the tool belt pockets and compartments. This step is essential to prepare for proper cleaning. Start by removing each tool and item from the pockets of your tool belt. Shake out or brush off any dirt, dust, or debris that may have accumulated in the pockets. Next, empty all the compartments in the tool belt by taking out all the tools stored inside.
Make sure to inspect each pocket and compartment thoroughly to ensure nothing is left behind. This will not only help in cleaning the tool belt more effectively but also prevent any damage to your tools from dirt or moisture. Once you have cleared out all the tools and debris, your tool belt will be ready for the next step in the cleaning process.
Spot clean any stains
Dip the brush or cloth in the soapy water and gently scrub any visible stains on the tool belt. Use back-and-forth or circular motions to work the soap into the fabric. Make sure to cover the entire stained area thoroughly. After scrubbing, rinse the brush or cloth with clean water, then dampen a new cloth with water and gently wipe the soapy residue off the tool belt. Finally, let the belt air dry completely before using it again.
Clean the entire tool belt
Dip the brush or cloth in the soapy water and scrub the entire surface of the tool belt, paying extra attention to heavily soiled areas. Make sure to thoroughly work the soapy water into the fabric or material, ensuring all dirt and grime are lifted off. Use a circular motion to effectively clean the entire surface of the tool belt. Rinse the brush or cloth regularly to remove the loosened dirt. Continue this process until the entire tool belt looks clean and free from visible dirt. Allow the tool belt to air dry completely before storing or using it to prevent any potential damage. If necessary, repeat the cleaning process until you are satisfied with the cleanliness of your tool belt.
Rinse and dry the tool belt
- Rinse the tool belt thoroughly with clean water to remove any detergent residue.
- Make sure all soap has been washed off to prevent any skin irritation.
- Hang the tool belt in a well-ventilated area to air dry completely.
- Ensure the tool belt is completely dry before storing or using it again.
- Check the belt for any remaining moisture before putting it away.
Condition the tool belt (optional)
Apply a leather conditioner or treatment regularly to keep your tool belt in top shape. This maintains the suppleness of the leather, preventing it from drying out and becoming stiff or cracked over time. Start by wiping down the entire belt with a clean, dry cloth to remove any dirt or debris. Next, apply a small amount of leather conditioner to a soft cloth and rub it evenly onto the surface of the tool belt. Make sure to work the conditioner into the leather, paying extra attention to any areas that are prone to wear and tear, such as the edges and buckle holes.
Allow the leather conditioner to absorb into the belt for a few minutes, then wipe off any excess with a clean, dry cloth. For best results, repeat this process every few months or as needed, depending on how often you use your tool belt. Using a high-quality leather conditioner will help prolong the life of your tool belt by keeping the material well-moisturized and protected from the elements. Remember, a well-conditioned tool belt not only looks great but also ensures that your tools are stored securely and your belt remains comfortable to wear for hours on end.
Maintaining Your Tool Belt
In conclusion, keeping your durable tool belt clean doesn’t have to be a complicated task. By following the simple steps outlined in this guide, such as wiping it down regularly, using gentle soap and water for tougher stains, and allowing it to air dry completely, you can ensure your tool belt stays in top condition for years to come. Remember, a clean tool belt not only looks professional but also helps extend its lifespan, keeping your tools organized and easily accessible whenever you need them. So, invest a little time in cleaning and maintaining your tool belt, and it will serve you well in all your projects ahead.
Cleaning Equipment Needed
Maintenance Made Easy
Step-by-Step Guide to Properly Utilizing Your Durable Tool Belt
- Adjust Belt Size: Ensure the tool belt fits comfortably around your waist by adjusting the size using the buckle or Velcro straps
- Organize Tools: Place your commonly used tools in the designated pockets or pouches for easy access during your tasks
- Distribute Weight: Spread out the weight of your tools evenly across the tool belt to prevent strain on your back and hips
- Securely Fasten Belt: Make sure the tool belt is securely fastened around your waist to prevent it from slipping or moving while you work
- Practice Safety: Always be mindful of the tools in your belt to avoid accidental injuries. Keep sharp objects pointing away from your body
Frequently Asked Questions
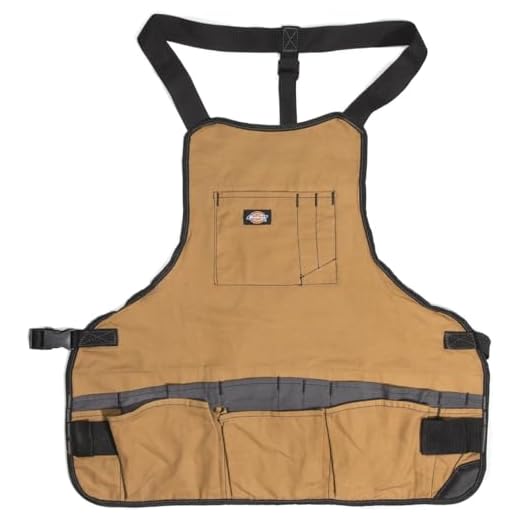
The tool belt has a total of 8 pockets to help you efficiently carry and organize your tools while working.
Yes, tool belts typically come with a manufacturer’s warranty. The length and coverage of the warranty may vary depending on the brand and model of the tool belt. It is recommended to check the product specifications or contact the manufacturer directly to confirm the warranty details for the specific tool belt you are considering.
A water-resistant tool belt will offer some protection against light rain or splashes, helping to keep your tools dry in mild conditions. On the other hand, a waterproof tool belt is designed to prevent any water from penetrating the material, even in heavy rain or submersion. To determine the level of protection your tool belt offers, you should check the product specifications or contact the manufacturer for more detailed information.


I followed these steps to clean my durable tool belt after a messy project, and it looks good as new! The spot cleaning really made a difference in removing stubborn stains.
Thank you for sharing your success story! Spot cleaning can indeed work wonders on tough stains.
Have you considered writing an article on how to store tool belts properly to extend their lifespan? I think that would complement this cleaning guide nicely.
That’s a great suggestion! Proper storage can indeed help maintain the quality of tool belts. We’ll look into creating a guide on that topic.
Could you recommend a specific brand of leather conditioner that works well for tool belts? I’d love to try one out to keep my belt in top condition.
One popular brand that many users recommend for tool belts is ‘Obenauf’s Heavy Duty LP Leather Conditioner’. It’s known for its protective properties and is suitable for rugged use.
How often should I condition my tool belt if I use it daily for work? Is there a recommended frequency to maintain its durability?
Conditioning your tool belt every 3-6 months if you use it daily is a good rule of thumb. Adjust based on how frequently it gets exposed to dirt, moisture, or extreme conditions.
I modified step 6 by using a leather conditioner specifically made for heavy-duty work gear. It helped keep my tool belt in top shape for longer periods between cleanings.
That’s a great adaptation! Using a specialized leather conditioner can provide extra protection for your tool belt.
I’d be interested in learning how to repair minor tears or damages on a durable tool belt. Perhaps a future article could cover some DIY repair techniques?
That’s a great suggestion! DIY repair techniques can be handy for extending the life of your tool belt. We’ll consider creating a guide on that topic.
I found that using a soft-bristled brush to gently scrub dirt off my tool belt before cleaning it helped to prevent stains from setting in. It’s a simple but effective tip!
I’ve been using a durable tool belt for years, and one tip I can share is to avoid using harsh chemicals for cleaning as they can damage the material over time. Natural cleaners work best!
Thank you for sharing your valuable tip! Natural cleaners are gentler on the material and can help preserve the integrity of the tool belt.