


This step-by-step guide is intended to aid users in avoiding chipping when using a tile cutter. It provides tips and techniques to ensure clean and precise cuts on tiles without any unwanted chips or damage to the material. By following the outlined steps, users can enhance the quality of their tile cutting projects and achieve professional results.

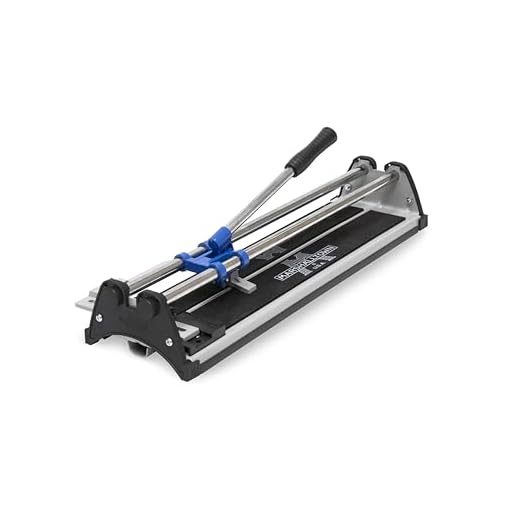

Choose the Right Blade
Select a tile cutter with a high-quality diamond blade that is appropriate for the type of tile you are cutting. Ensure the blade you choose is specifically designed to cut through the material of your tile – whether it’s ceramic, porcelain, stone, or glass. Look for the blade that is labeled as suitable for the hardness and thickness of the tile you are working with. You can find this information on the blade packaging or consult with a professional at your local hardware store to ensure you are selecting the right blade for your tile cutting project. Remember, using the correct blade will make your cutting process smoother and more precise, resulting in cleaner cuts and minimizing the risk of damaging your tiles.
Inspect the Tile
- Inspect the Tile: Ensure the tile is clean and free of any debris or dirt that could cause chipping during cutting. Wipe the tile surface with a damp cloth to remove any dust or dirt. Check for any loose particles that could interfere with the cutting process.
- Clean Tile Surface: Use a mild detergent solution and a sponge to clean the tile thoroughly. Make sure there are no sticky substances or residues left on the tile. Rinse the tile with clean water and dry it completely before proceeding with the cutting process.
- Remove Debris: Inspect the tile edges carefully for any small pebbles, grit, or dirt that could affect the cutting blade. Use a small brush or compressed air to remove any debris trapped in the tile’s surface. Ensure the tile is smooth and free of any obstructions before cutting.
Mark the Cut Line
Use a pencil or marker to clearly mark the line where you want to cut the tile, ensuring accuracy. Ensure that the line is straight and runs across the tile where you intend to make the cut. Take a straight edge or a ruler to guide your marking and maintain precision. Be meticulous in this step to avoid any inaccuracies that could affect the final outcome of your tile cutting. Remember, a well-marked cut line will help you achieve the desired shape or size for your tile project.
Secure the Tile
Ensure the tile is firmly secured on the cutter to prevent any unwanted movement while cutting. Begin by placing the tile on the cutter bed, ensuring it is aligned correctly according to your desired cut. Slide the adjustable guide to hold the tile securely in place. Double-check the positioning to make sure the tile is flat and stable on the cutter.
Next, gently tighten the cutter’s adjustable screw or knob to firmly hold the tile in place. It is crucial to confirm that the tile does not wobble or shift when pressure is applied as this may result in inaccurate cuts or potential accidents. By ensuring the tile is securely held in position on the cutter, you will achieve precise and safe cutting results.
Cut with Even Pressure
Apply smooth and continuous pressure on the cutting tool to maintain a consistent flow and prevent creating stress points. For instance, when slicing vegetables, use a sharp knife and guide it through the produce in one fluid motion without exerting excessive force. Additionally, when cutting paper or fabric with scissors, avoid squeezing the handles too tightly or unevenly, as it can cause jagged edges due to varying pressure points. Remember to pace your cuts evenly to ensure a clean and precise outcome. By maintaining a steady hand and uniform pressure, you can minimize the risk of chipping or tearing materials while cutting.
Use Protective Gear
When cutting materials, such as wood or metal, always wear safety goggles and gloves to protect yourself. Safety goggles shield your eyes from any debris or particles that may fly up during the cutting process. Ensure the goggles fit snugly against your face to provide maximum protection. Gloves are essential to protect your hands from sharp edges or potential burns. Choose gloves that fit well and are suitable for the material you are working with. Always inspect your goggles and gloves before starting work to ensure they are in good condition. Remember, wearing safety gear is crucial for your well-being during any cutting operation.
Best Practices Summary
By implementing the tips shared in this blog post and practicing the correct techniques, achieving clean, accurate cuts with minimal chipping when using a tile cutter is absolutely attainable. Remember to prioritize precision and patience for the best results!
Tools List

Proven Techniques for Precision
Usage Instructions for Tile Cutters
- Measure and mark the tile: Use a pencil and a straight edge to mark where you will be cutting the tile
- Set up the tile cutter: Adjust the cutting wheel on the tile cutter to line up with your mark, and tighten it in place
- Score the tile: Place the tile on the cutter, apply pressure on the handle, and run the cutting wheel along your marked line to score the surface of the tile
- Snap the tile: Once the tile is scored, use the tile cutter’s breaker mechanism to snap the tile cleanly along the line you’ve scored
- Smooth the edges: Use a rubbing stone or sandpaper to smooth out any rough edges left from the cut
Tile Cutter FAQs
Yes, a tile cutter can be used to cut materials other than tiles, such as glass, ceramic, and porcelain. However, it may not be as effective or precise when cutting different materials compared to using the appropriate cutting tool for each specific material. Be cautious when using a tile cutter on other materials to ensure safety and desired results.
Some common troubleshooting issues with tile cutters include blades becoming dull or chipped, difficulty in making straight cuts, tile getting cracked during cutting, and water pump malfunctions on wet tile cutters. Regularly checking and replacing blades, ensuring proper alignment and technique for straight cuts, using appropriate pressure when cutting tiles, and maintaining the water pump for wet cutters can help address these issues effectively. Remember to always follow the manufacturer’s guidelines for proper maintenance and use of your tile cutter.
Yes, a tile cutter can be used for both straight and angled cuts. Most manual tile cutters come with adjustable guides and measurement systems that allow you to cut tiles at different angles, in addition to straight cuts. This versatility makes a tile cutter a handy tool for various tiling projects. Just make sure to follow the manufacturer’s instructions to achieve precise and accurate cuts.
When choosing a tile cutter, key features to consider include the type of tile you will be cutting (ceramic, porcelain, natural stone), the maximum tile size it can handle, the blade material and quality, the cutting mechanism (manual, electric, or wet tile cutter), the presence of angle guides for making precise cuts, and the overall durability and reliability of the tool. Make sure to select a tile cutter that meets your specific needs and is suitable for the types of projects you will be working on.






One additional tip I would suggest is to make sure the tile is properly supported throughout the cutting process. Placing a piece of scrap wood underneath the tile can help reduce vibrations and minimize chipping.
That’s a great suggestion! Proper support is crucial in achieving clean cuts, and using a scrap wood piece is a smart way to stabilize the tile. Thank you for sharing!
I adapted the step of securing the tile by using painter’s tape to create a buffer zone along the cut line. This helped to provide extra support and prevented any accidental slippage during cutting.
Can you recommend a particular brand of protective gear that offers both comfort and maximum safety when using a tile cutter?
For protective gear, I highly recommend checking out brands like DeWalt or 3M for quality safety equipment that ensures both comfort and protection.
I used the tips from this guide to renovate my kitchen backsplash. By following these steps, I was able to achieve clean cuts without any unsightly chips, resulting in a professional-looking finish.
I found that using a diamond blade specifically designed for cutting porcelain tiles greatly reduced chipping for me. Investing in a high-quality blade made a noticeable difference in the finished results.