


Ever been knee-deep in a tiling project only to have your electric cutter throw a fit? Yeah, me too. It’s like the universe is testing your patience. But here’s the thing – most of these hiccups are fixable if you know what to look for.
Let’s dive into the world of electric tile cutter troubles and how to kick them to the curb.
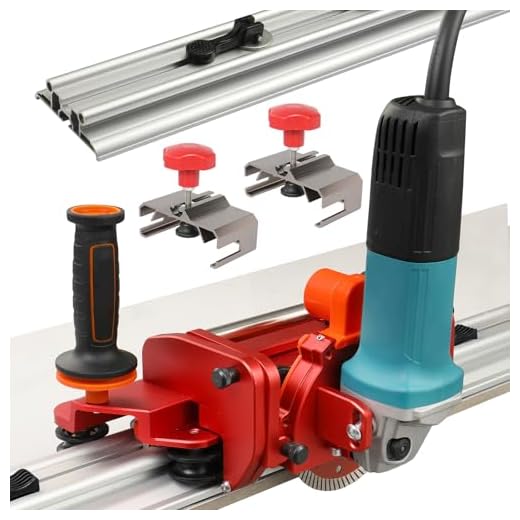


Power Problems: When Your Cutter’s Just Not Feeling It
First things first – is your cutter even getting juice?
- Check if it’s plugged in (I know, I know, but we’ve all been there)
- Look for tripped circuit breakers or blown fuses
- Test the outlet with another device
If power’s flowing but your cutter’s still playing dead, it might be time to call in the pros.
But before you do, let’s dig a little deeper:
- Check the power cord for any visible damage or fraying
- Inspect the plug for bent prongs or signs of overheating
- If your cutter has a removable battery, ensure it’s properly seated and charged
Pro Tip: Keep a multimeter in your toolbox. It’s a game-changer for diagnosing electrical issues.
Blade Blues: Dull Cuts and Rough Edges
A dull blade is like a chef with a butter knife – it just won’t cut it. Here’s what to look out for:
- Chipping or cracking tiles
- Rough, uneven cuts
- Having to push harder than usual
Time for a blade change? Probably. And hey, don’t skimp on quality here. A good blade is worth its weight in perfectly cut tiles.
Let’s talk blade maintenance:
- Clean your blade after each use to prevent buildup
- Check for any bent or missing teeth
- Rotate your blade periodically for even wear
Blade Buying Guide:
- Continuous rim blades: Best for precise cuts on ceramic and porcelain
- Segmented blades: Great for faster cuts on tougher materials
- Turbo blades: A balance between speed and precision
Remember, the right blade can make or break your project. Literally.
Water Woes: When the Flow’s a No-Go
No water flow? That’s a recipe for overheating and a smoky mess. Let’s fix it:
- Check if the water reservoir’s full
- Look for kinks in the water line
- Clean out any gunk in the pump or reservoir
Pro tip: Mix a bit of vinegar with water in the reservoir occasionally. It’ll keep mineral buildup at bay.
But wait, there’s more:
- Inspect the water nozzle for blockages
- Check the water flow adjustment knob (if your model has one)
- Listen for the pump running – if it’s silent, you might have a pump issue
Depth Dilemmas: Getting the Right Cut
If your cuts are too shallow or deep, your depth setting might be off. Here’s how to nail it:
- Measure your tile thickness
- Adjust the cutting depth to match
- Do a test cut on a scrap tile
Remember, precision is key. Even a millimeter off can mess up your whole project.
Let’s dive deeper:
- Check if your depth adjustment mechanism is clean and smooth
- Ensure the locking mechanism is secure
- Consider marking your most-used depths for quick reference
Precision Pointer: Use a depth gauge for ultra-precise measurements. Your future self will thank you.

Cooling Catastrophes: Overheating Issues with Electric Tile Cutters
Is your cutter feeling hotter than a summer sidewalk? That’s not good. Let’s cool things down:
- Clear any blockages in the cooling vents
- Ensure there’s enough airflow around the cutter
- Check if the water cooling system is working properly
Overheating can fry your motor, so don’t ignore this one.
Additional cooling checks:
- Feel for any hot spots on the cutter’s body
- Listen for any changes in motor sound – overheating can cause a higher pitch
- If your cutter has a thermal cut-off, ensure it’s functioning
Safety Snafus: When Protection Fails
Safety features acting up? That’s a big no-no. Here’s what to check:
- Blade guards should be firmly in place
- Emergency stop button should work instantly
- Check for any loose parts or weird noises
If anything seems off, stop using the cutter immediately. Safety first, always.
Let’s talk safety upgrades:
- Consider adding a GFCI (Ground Fault Circuit Interrupter) to your power setup
- Invest in cut-resistant gloves – your fingers will thank you
- Use push sticks for small cuts to keep your hands away from the blade
Alignment Aggravations: Crooked Cuts and Misalignments
Getting cuts that look like they were done after a few too many? Let’s straighten things out:
- Check if the cutting table is level
- Ensure the fence is properly aligned
- Look for any wobble in the blade
A well-aligned cutter is the difference between pro results and a tiling tragedy.
Alignment pro tips:
- Use a carpenter’s square to check table-to-fence alignment
- Check for any debris under the cutting table that might throw off the level
- Consider using a laser guide for ultra-straight cuts

Motor Mayhem: When the Heart of Your Cutter Falters
If your motor’s sounding like a dying car, we’ve got trouble. Here’s what to do:
- Listen for any unusual noises
- Check for burning smells
- See if the motor’s overheating
Motor issues often need a pro’s touch. Don’t try to be a hero here – call in the experts.
But before you do:
- Check the brushes (if your motor has them) – they might need replacing
- Ensure the motor vents are clear of dust and debris
- If your cutter has a belt drive, check for proper tension
Dust Disasters: When Cleanliness is Next to Impossible
Excessive dust isn’t just messy – it can be dangerous. Let’s clear the air:
- Ensure the water flow is adequate
- Check if the dust collection system (if any) is working
- Consider using a dust shroud attachment
Remember, breathing in tile dust is no joke. Protect those lungs, folks.
Dust-busting bonus round:
- Use a vacuum attachment designed for tile dust
- Consider cutting outdoors when possible
- Invest in a good quality dust mask – your lungs are worth it
Precision Problems: When Accuracy Goes Out the Window
Cuts looking like they were done blindfolded? Time to tighten things up:
- Check if the measuring guide is accurate
- Ensure the cutting wheel is properly aligned
- Look for any play in the cutting arm
Precision is what separates the pros from the amateurs. Don’t settle for less.
Precision boosters:
- Use a digital angle finder for spot-on miter cuts
- Consider upgrading to a laser guide system
- Keep a set of feeler gauges handy for fine-tuning alignments
Essential Equipment for Troubleshooting Issues with Electric Tile Cutters

Expert Cutting Insights
Steps for Efficiently Operating Your Electric Tile Cutter
- Set up on a stable surface – wobbling is not your friend
- Measure twice, cut once – accuracy is everything
- Gear up – safety goggles and gloves are non-negotiable
- Practice on scrap tiles – get a feel for your cutter
- Let the cutter do the work – don’t force it
Wrapping It Up: Keeping Your Cutter Happy
Look, at the end of the day, your electric tile cutter is like any other tool – treat it right, and it’ll treat you right. Regular maintenance, proper use, and a bit of TLC go a long way.
Remember, the key to avoiding common issues is staying ahead of them. Clean your cutter after each use, check for wear and tear regularly, and don’t ignore small problems before they become big ones.
And hey, if all else fails, there’s no shame in calling in a pro. Sometimes, that’s the smartest move you can make.
Now go forth and cut those tiles like a boss. You’ve got this.
Common Issues with Electric Tile Cutters are totally manageable if you know what to look for. Keep this guide handy, and you’ll be troubleshooting like a pro in no time.
Remember, every great tiling job starts with a well-maintained cutter. So give your tool some love, and it’ll return the favor with clean, precise cuts every time. Happy tiling, folks!
FAQs: Because You’re Probably Wondering…
Absolutely! Most modern cutters come with adjustable angles. Just make sure to practice on some scrap tiles first. Start with 45-degree cuts – they’re the most common for corner work.
If you’re seeing chipping, requiring more pressure, or hearing weird noises, it’s probably blade o’clock. Also, if you notice the blade’s diameter has decreased significantly due to wear, it’s time for a new one.
They can be. Think vacuum cleaner level. Ear protection isn’t a bad idea, especially for big projects. Some newer models are designed for quieter operation, but they’re still not whisper-quiet.
It’s like a mini waterfall for your blade. It keeps things cool, reduces dust, and helps you make smoother cuts. The water is typically pumped from a reservoir and directed onto the blade and cutting area.
Usually, yes. It’s one of the features that makes them so versatile. Most have a depth adjustment knob or lever that allows you to set the blade depth for different tile thicknesses.
Totally. They’re user-friendly enough for DIYers but powerful enough for pros. Just make sure to start with some practice cuts and always prioritize safety.
Ideally, after every use. A quick wipe-down and clearing of dust and debris can go a long way. For more thorough cleaning, once a month or before big projects is a good rule of thumb.
It depends on your specific model and blade. Some high-end cutters can handle a variety of materials, but you’ll need the right blade for each. Always check your user manual before attempting to cut anything other than standard tiles.
It varies based on usage and material, but a good quality blade can last for 500-1000 square feet of cutting. However, if you’re cutting harder materials or using the cutter frequently, you might need to replace it sooner.




I encountered an issue with the safety features of my electric tile cutter not functioning correctly. Any troubleshooting tips for this particular problem?
When safety features malfunction, it’s crucial to stop using the cutter immediately. I recommend contacting the manufacturer for professional assistance to ensure safe operation.
I followed the guide and still can’t get my electric tile cutter to work. I checked the power supply and blade, but it’s still not functioning. Any specific recommendations for troubleshooting further?
How often should the cutting depth be adjusted for different tile materials? Would love to know more about the best practices for adjusting cutting depth based on the type of tile being cut.
Adjusting cutting depth can vary based on tile materials. I’ll include a section on best practices for adjusting cutting depth as per tile types in the guide.
After cleaning the water reservoir, my tile cutter seems to work much better now. Thank you for the detailed instructions!
I followed the steps outlined in the guide, but my electric tile cutter is making a strange noise during operation. Any ideas on what could be causing this issue?
I’ve had issues with water flow in the past. One tip that worked for me is to check for any clogs or kinks in the water hose. It’s important for consistent cutting performance.
Thank you for sharing your tip! Checking for clogs or kinks in the water hose is a great addition to troubleshooting water flow issues.
I’ve successfully used this guide to troubleshoot my electric tile cutter. It’s now working perfectly, and I’m impressed with the detailed steps provided. Thank you!
Thank you for sharing your success story! I’m glad the guide helped you troubleshoot your electric tile cutter effectively.
I found that adjusting the cutting depth slightly shallower than recommended in the guide actually improved the precision of my cuts on certain tile materials. It’s worth experimenting with different depths for optimal results.
That’s an interesting approach! Adapting the cutting depth for improved precision is a great tip. It’s always good to experiment and find what works best for your specific needs.
Can you include a section on blade maintenance and replacement in the guide? It would be helpful to know when and how to change the blade for optimal performance.
Thank you for the suggestion! I will definitely add a section on blade maintenance and replacement in the next update of the guide.