
The step-by-step guide “How to Set Up Your Bosch CLPK22-120 12V Combo Kit” is designed to help users easily assemble their Bosch CLPK22-120 12V Combo Kit by providing detailed instructions on each tool included in the kit and how they can be utilized. This post aims to assist readers in efficiently setting up their kit and addressing any concerns or confusion they may have about the process.


Unboxing the Kit
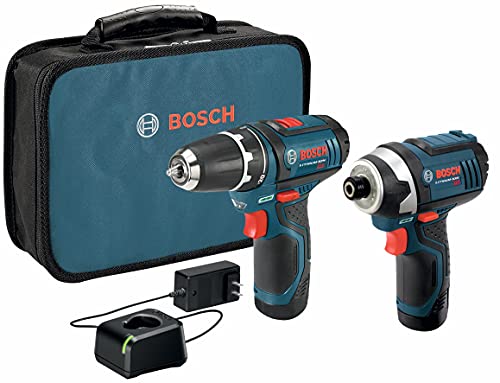
Carefully unpack the Bosch CLPK22-120 12V Combo Kit box. Lay out all the components to ensure everything is present and in good condition. Check off each item against the included checklist or parts list if available. Once you have confirmed all the parts are accounted for, locate the user manual. Take the time to read through it to familiarize yourself with each tool included in the kit.
For example, examine each tool and its accessories as outlined in the manual. Identify the function of each tool and understand its proper usage. This will help you utilize the kit effectively and safely. Take note of any safety precautions or guidelines provided in the user manual. By familiarizing yourself with the tools and their functions, you will be better prepared to tackle your projects with confidence.
Charging the Batteries
Locate the charger included in the kit. Insert the batteries into the charger ensuring they are placed correctly according to the polarity indicators. Next, plug the charger into a power source with the provided cable. Make sure the power source is stable and switched on.
Allow the batteries to charge fully before proceeding to use them in your device. Be patient and give the batteries enough time to charge completely. Check the indicator lights on the charger to know when the charging process is finished. Once fully charged, remove the batteries from the charger and they are now ready for use.
Attaching Drill/Driver Bits
Select the appropriate drill or driver bit for your project. Ensure that the bit matches the type of material you are working with and the size of the screw or hole you need to create. Once you have the right bit, insert it securely into the chuck of the drill or driver. Hold the bit with your fingers and insert it into the chuck, making sure it is straight and fully seated. Use the chuck key provided with your tool to tighten the chuck around the bit. Insert the key into the holes on the chuck and turn it clockwise to secure the bit in place. Make sure it is firmly tightened before you start your project for safety and efficiency.
Using the Drill/Driver
Adjust the torque settings on the drill/driver by turning the torque adjustment collar to the desired setting. Lower torque settings are suitable for delicate materials and higher settings for tougher materials. Ensure the torque setting matches the task at hand to prevent damaging the material or losing control of the tool. Hold the tool firmly with both hands, positioning yourself securely before starting. Activate the drill/driver by squeezing the trigger gradually. Apply consistent and steady pressure as the tool engages with the material. Maintain a firm grip and keep the drill/driver steady throughout your project to achieve precise and efficient results.
Switching to Impact Driver
- Locate the mode switch on your impact driver. This switch is typically found near the chuck of the tool.
- Identify the settings available on the mode switch. Look for markings that indicate the different modes, such as drill or drive.
- Choose the appropriate mode for your task. If you are drilling holes, select the drill mode. If you are driving screws, opt for the screw driving mode.
- Adjust the mode switch by sliding or rotating it to the desired setting. Make sure it clicks into place securely before using the impact driver.
By following these simple steps, you can easily switch your impact driver to the mode that best suits your project.
Using the Impact Driver
Hold the impact driver perpendicular to the surface at all times when driving screws. This ensures that the screws are inserted straight and securely. Apply steady pressure while using the impact driver to drive the screws into place. Avoid using excessive force, as the impact driver’s mechanism is designed to do the work efficiently with consistent, moderate pressure.
When using the impact driver, make sure to select the appropriate speed settings based on the type of material you are working with and the size of the screws. Lower speeds are typically best for delicate materials, while higher speeds are more suitable for tougher materials. Adjusting the speed settings correctly will help you achieve optimal results and prevent damage to the material or the screws. Remember to always work with precision and care when operating the impact driver for the best outcomes.
Safety Precautions
Always wear appropriate safety gear such as goggles and gloves. Make sure they fit well and are in good condition. Following all safety instructions provided in the user manual is crucial to prevent accidents. Take the time to thoroughly understand and adhere to the guidelines outlined. By wearing the necessary safety equipment and heeding the instructions in the manual, you are proactively minimizing any potential risks that might arise while using the equipment. Be diligent in maintaining this safety practice each time you use the equipment, ensuring a secure and protected working environment for yourself and others.
Final Thoughts and Recommendations
In conclusion, setting up your Bosch CLPK22-120 12V Combo Kit is key to maximizing its efficiency and ensuring your safety. By following the steps outlined in this guide, you can make the most of your tools and complete your projects with ease. Remember to prioritize proper setup and safe usage to prolong the lifespan of your kit and enjoy excellent results. Happy building!
Essential Equipment Needed
Pro Tips for Setup
Usage Instructions for Bosch CLPK22-120 12V Combo Kit
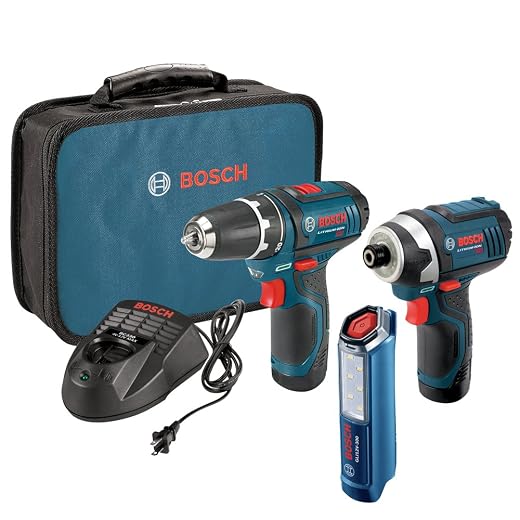
- Start by familiarizing yourself with the contents of the Bosch CLPK22-120 12V Combo Kit, which typically include a drill, driver, batteries, charger, and a carrying case
- Read the user manual provided with the kit to understand the functionality and safety instructions of each tool
- Charge the batteries fully before use to ensure optimal performance
- Use the drill for drilling holes in various materials such as wood, metal, or plastic
- Use the driver for driving screws into different surfaces. Adjust the torque settings as needed depending on the type of screw and material
Frequently Asked Questions (FAQs)
The maximum torque output of a drill/driver can vary based on the model and brand. It is typically measured in Inch-Pounds (in-lbs) or Newton Meters (Nm). To find the specific maximum torque output of a drill/driver, you should refer to the product specifications provided by the manufacturer or check the user manual. This will give you the exact torque output for the particular drill/driver you are interested in.
Yes, there is an LED light on the tools in the kit.
The kit includes a USB-C charger.


Instead of using the impact driver for certain tasks, I found that the drill/driver worked better for precision drilling in delicate materials like ceramics. It provided better control and prevented accidental damage.
That’s a great tip! Using the drill/driver for precision drilling in delicate materials is a smart choice to maintain control and accuracy. It’s always good to adapt tool use based on the specific requirements of your project.
I have a question regarding the battery life of the Bosch CLPK22-120 12V Combo Kit. How long does a fully charged battery typically last with regular use before needing a recharge?
The battery life of the Bosch CLPK22-120 12V Combo Kit can vary depending on the intensity and duration of use. On average, a fully charged battery can last several hours of continuous use. It’s recommended to have spare batteries on hand for longer projects or tasks to avoid interruptions.
Could you recommend any accessories or additional attachments that would complement the Bosch CLPK22-120 12V Combo Kit for more specialized tasks like plumbing or electrical work?
For plumbing tasks, consider getting paddle bits or auger bits for drilling through wood and thicker materials. For electrical work, look into getting nut drivers or spade bits for specific applications. Always ensure compatibility with your kit before purchasing additional accessories.
I followed this guide and successfully assembled a bookshelf using the Bosch CLPK22-120 12V Combo Kit. The instructions were clear and easy to follow, making the project smooth and efficient.
Thank you for sharing your positive experience! We’re glad to hear that the guide helped you complete your project successfully. Feel free to reach out if you have any more projects in mind or need further assistance.
To ensure the drill bits are securely attached, make sure you are using the correct size and type of bit for your drill. Check for any obstructions in the chuck that may prevent a proper fit. If the issue persists, try gently cleaning the chuck and the bit shank to remove any debris that could be causing the problem.
Can the Bosch CLPK22-120 12V Combo Kit be used for woodworking projects? I’m interested in making some small furniture pieces and wonder if this kit would be suitable.
Yes, the Bosch CLPK22-120 12V Combo Kit is versatile and can be used for woodworking projects like making small furniture pieces. Just make sure to use the appropriate drill/driver or impact driver bits and adjust the settings accordingly for different types of wood.
I’m having trouble attaching the drill bits as they seem to not fit securely. Can anyone provide tips on how to properly attach them to the Bosch CLPK22-120 12V Combo Kit?