Master Your 3 Point Hitch Wood Chipper Guide

If you’ve ever looked at a pile of branches and wondered how to turn them into useful mulch, a 3 point hitch wood chipper attachment for tractors is the answer.
This guide will help you understand how these machines work, how to choose the right one for your needs, and how to use and maintain it effectively.
Whether you’re a beginner or have some experience, this guide will provide valuable insights to help you manage your yard waste efficiently.
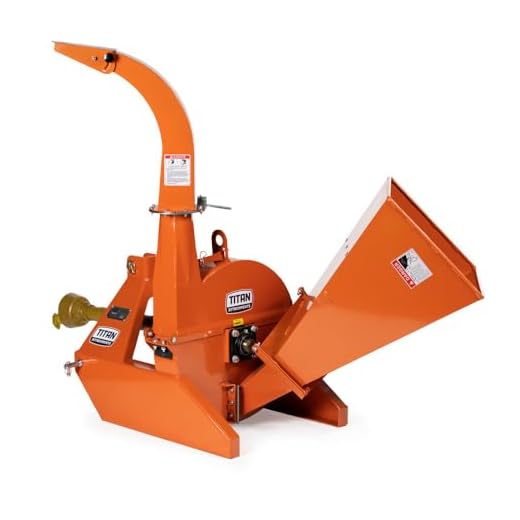
Titan Attachments 3 Point PTO Driven 4"x 10" Wood Chipper Shredder Mulcher, Adjustable Exit Chute, Up to 40HP, 25" Rotor, Easy to Mount, Accepts Entire Trees
Disclosure
This post contains affiliate links. If you make a purchase through these links, we may earn a small commission at no extra cost to you.
Key Takeaways
- A 3 point hitch wood chipper connects easily to your tractor, making yard work easier.
- Choose a chipper that matches your tractor’s horsepower for the best performance.
- Regular maintenance, like sharpening blades, keeps your chipper working well.
- Always check safety features to protect yourself while using the chipper.
- Using the right feeding techniques can improve efficiency and reduce jams.
Understanding the Basics of 3 Point Hitch Wood Chippers
What is a 3 Point Hitch Wood Chipper?
A 3 point hitch wood chipper is a machine that attaches to the back of a tractor. It’s designed to turn branches and brush into mulch. This makes yard cleanup a lot easier. Instead of hauling away debris, you can chip it right on the spot.
How Does It Work with Tractors?
These chippers connect to the tractor’s PTO (Power Take-Off) system. This means they use the tractor’s power to operate. When you start the tractor, the chipper begins to work. It can handle branches up to a certain size, depending on the model.
Key Features to Look For
When choosing a wood chipper, consider these features:
- Self-feeding chutes: They pull in branches automatically, saving you time and effort.
- Adjustable exit chutes: You can direct the chips where you want them.
- Durable blades: Look for models with strong, reversible blades to extend their life.
Using a 3 point hitch wood chipper can really change how you manage yard waste. It’s efficient and makes the job much easier.
Disclosure
This post contains affiliate links. If you make a purchase through these links, we may earn a small commission at no extra cost to you.
Choosing the Right 3 Point Hitch Wood Chipper for Your Tractor
Matching Chipper Size to Tractor Power
When it comes to picking a chipper, size matters. You want to match your chipper to your tractor’s horsepower. For instance, a 25″ rotor is great for tractors up to 40HP, while a 30″ rotor works best for those with 70HP. Here’s a quick breakdown:
| Chipper Size | Recommended HP |
|---|---|
| 25″ | Up to 40HP |
| 30″ | Up to 70HP |
Considerations for Different Types of Wood
Not all wood is created equal. Different types of wood need different power levels. Here’s what to keep in mind:
- Hardwoods like oak need more power.
- Softwoods like pine are easier to chip.
- Branch size matters too; larger branches require more robust equipment.
Budgeting for Your Chipper
While I won’t dive into prices, it’s smart to think about your budget. Consider these points:
- Initial cost of the chipper.
- Maintenance costs over time.
- Potential savings from not hiring out for brush removal.
Investing in a good chipper can save you time and effort in the long run.
So, whether you’re looking for a 3 point wood chipper for sale or a used option, make sure it fits your tractor and your needs. Happy chipping!
Setting Up Your 3 Point Hitch Wood Chipper

Initial Assembly Tips
Setting up your 3 point hitch wood chipper can be a breeze if you follow a few simple steps. Here’s what I usually do:
- Unpack everything carefully. Make sure you have all the parts.
- Read the manual. It’s not just for show; it helps a lot!
- Assemble the frame. This is usually straightforward, just follow the instructions.
Attaching to Your Tractor
Now, let’s get that 3pt chipper attached to your tractor. Here’s how:
- Align the chipper with the tractor hitch. It should fit snugly.
- Secure the pins. Make sure everything is locked in place.
- Connect the PTO shaft. This is crucial for power.
Safety Checks Before Use
Before you start chipping away, do a quick safety check:
- Inspect the chipper. Look for any loose parts or damage.
- Check the PTO connection. Ensure it’s secure.
- Wear protective gear. Safety glasses and gloves are a must!
Remember, a well-set-up 3 point hitch chipper not only works better but also keeps you safe.
By following these steps, you’ll be ready to tackle that brush pile in no time!

Operating Your 3 Point Hitch Wood Chipper Like a Pro
Feeding Techniques for Best Results
When it comes to using a 3 point PTO chipper, feeding the branches correctly is key. Here’s how I do it:
- Start with larger branches first. They help warm up the chipper.
- Feed at an angle. This helps the machine pull the material in better.
- Avoid overloading. Too much at once can cause jams.
Avoiding Common Mistakes
I’ve made my share of mistakes, and here’s what I learned:
- Don’t rush. Take your time to feed the branches properly.
- Watch for clogs. If you hear strange noises, stop and check.
- Keep the area clear. A clean workspace is a safe workspace.
Maximizing Efficiency
To get the most out of your chipper, consider these tips:
- Regularly check the blades. Sharp blades make a big difference.
- Adjust the feed rate based on the material. Softer woods can go faster.
- Use the right size chipper for your tractor. It makes everything smoother.
Remember, operating a wood chipper is as much about technique as it is about the machine itself. Mastering these skills will make your chipping experience much more enjoyable!
Maintenance Tips to Keep Your Chipper Running Smoothly
Regular Cleaning and Inspection
Keeping my three point chipper clean is a must. I always check for debris buildup after each use. A clean chipper runs better! Here’s what I do:
- Remove any stuck branches or leaves.
- Inspect the PTO shaft and connections for wear.
- Lubricate moving parts to keep everything smooth.
Blade Sharpening and Replacement
I can’t stress enough how important it is to keep the blades sharp. Dull blades can lead to poor performance. Here’s my routine:
- Check blade condition every 25-30 hours of use.
- Sharpen or replace blades every 50-60 hours.
- Adjust the blade gap as needed to maintain efficiency.
Troubleshooting Common Issues
Sometimes, things don’t go as planned. If my chipper isn’t working right, I follow these steps:
- Check for clogs in the feed chute.
- Ensure the tractor’s PTO is running at the right speed.
- Look for any unusual noises that might indicate a problem.
Keeping up with maintenance not only extends the life of my PTO powered chipper shredder but also ensures it runs efficiently.
By following these simple tips, I can keep my chipper in top shape and ready for action!
Safety First: Using Your Wood Chipper Responsibly
Understanding Safety Features
When I first got my wood chipper, I was amazed at how many safety features it had. These features are there for a reason!
- Emergency stop zones
- Anti-kickback mechanisms
- Clear sight lines for operation
- Properly spaced feed rollers
These built-in safety measures can really help prevent accidents. In fact, they’ve been shown to reduce operator incidents by over 80% in the last decade.
Personal Protective Equipment
Before I even think about starting my chipper, I make sure I’m wearing the right gear. Here’s what I always put on:
- Safety goggles
- Ear protection
- Heavy-duty gloves
- Steel-toed boots
It might seem like a hassle, but trust me, it’s worth it to keep yourself safe.
Emergency Procedures
Accidents can happen, even when you’re careful. Here’s what I do if something goes wrong:
- Shut off the machine immediately.
- Check for any blockages or issues.
- If something is stuck, I use a long branch to push it through instead of my hands.
- Always follow the proper procedures for clearing jams.
Remember, safety is not just a checklist; it’s a mindset. Always be aware of your surroundings and the machine’s operation.
By keeping these safety tips in mind, I can enjoy using my wood chipper without worrying too much. It’s all about being smart and prepared!
Advanced Techniques for Experienced Operators

Processing Different Types of Brush
When it comes to chipping, not all brush is created equal. Here’s how I tackle different types:
- Thick branches: Feed them straight in for the best results.
- Twigs and small stuff: Mix them in with larger pieces to keep the flow going.
- Wet material: Be careful! It can slow things down, so adjust your feed rate.
Optimizing Chip Size for Mulch
Getting the right chip size is key for effective mulching. Here’s what I do:
- Adjust the blade gap: A tighter gap gives smaller chips.
- Feed at the right angle: This helps the rotor pull the material in better.
- Experiment: Try different settings to see what works best for your needs.
Using Chipper Output Effectively
Once you’ve got your chips, it’s time to put them to good use:
- Mulching gardens: Spread chips around plants to keep moisture in.
- Pathways: Create natural walkways in your yard.
- Composting: Mix chips with other materials for a nutrient boost.
Remember: The more you practice, the better you’ll get at using your chipper. Don’t be afraid to try new techniques and see what works best for you!
Exploring Attachments and Accessories

Popular Add-Ons for Your Chipper
When it comes to enhancing your wood chipper, there are some cool attachments that can make your life easier. Here are a few I’ve found super helpful:
- Extended Discharge Chute: This lets you load chips directly into a cart or truck, so you don’t have to pick them up later. It’s a real back-saver!
- Extra Blades: Having a spare set of blades means you can quickly swap them out when they get dull. Trust me, it saves time.
- Safety Guards: These are essential for keeping you safe while you work. Always better to be safe than sorry!
Enhancing Functionality with Accessories
Adding accessories can really boost your chipper’s performance. Here’s what I recommend:
- Chipper Stand: Makes it easier to load and unload branches.
- Hopper Extension: This helps you feed larger branches without bending over.
- Mulch Bag: Perfect for collecting chips if you want to use them for landscaping.
Where to Find Quality Attachments
You can find great attachments and accessories at local hardware stores or online. Just make sure they’re compatible with your chipper model. I usually check out reviews to see what other users think before buying.
Remember, the right attachments can make your wood chipper even more efficient and enjoyable to use!
Titan Attachments 3 Point PTO Driven 4"x 10" Wood Chipper Shredder Mulcher, Adjustable Exit Chute, Up to 40HP, 25" Rotor, Easy to Mount, Accepts Entire Trees
Disclosure
This post contains affiliate links. If you make a purchase through these links, we may earn a small commission at no extra cost to you.
Real-Life Success Stories and Tips from Chipper Owners
Lessons Learned from Experienced Users
I’ve chatted with a lot of folks who’ve used their 3 point hitch wood chippers, and let me tell you, they’ve got some great stories. One guy told me he cleared three huge piles of branches in just an hour! That’s a serious time saver compared to his old chipper. Here are some common tips I’ve picked up:
- Always check the blades before starting.
- Use the self-feeding chute to save your back.
- Don’t overload the chipper; it works best with a steady feed.
Creative Uses for Chipper Output
After chipping, what do you do with all that mulch? Many users have found clever ways to use it:
- Mulching flower beds to keep weeds down.
- Creating paths in the garden.
- Composting to enrich the soil.
Community Advice and Recommendations
I’ve seen a lot of great advice shared in local gardening groups. Here’s what people recommend:
- Join a local gardening club for tips.
- Share your experiences online; it helps others!
- Attend workshops to learn more about wood chipper maintenance.
Remember, using a wood chipper isn’t just about clearing debris; it’s about making your yard work easier and more efficient.
So, if you’re thinking about getting one, just know you’re joining a community of happy chipper owners!
Environmental Benefits of Using a 3 Point Hitch Wood Chipper

When I think about using a 3 point wood chipper, I can’t help but feel good about the positive impact it has on the environment. These machines are not just about clearing debris; they play a crucial role in waste reduction and sustainability.
Reducing Waste and Promoting Recycling
Using a three point wood chipper helps in:
- Turning yard waste into mulch
- Reducing the amount of organic waste sent to landfills
- Promoting recycling of natural materials
By chipping branches and brush, I’m not just cleaning up my yard; I’m also contributing to a healthier planet.
Creating Sustainable Mulch
The mulch produced by a 3pt wood chipper is fantastic for:
- Improving soil health
- Retaining moisture in gardens
- Suppressing weeds
This means I can use the chips to enrich my garden, making it more productive and eco-friendly.
Supporting Local Ecosystems
When I use a PTO powered wood chipper, I’m also helping local wildlife. Here’s how:
- Providing habitat for small creatures
- Encouraging biodiversity by using natural materials
- Reducing the need for chemical fertilizers
In short, my three point chipper shredder is a tool that not only makes my life easier but also supports the environment.
Using a 3 point pto wood chipper is a win-win for me and the planet!
Using a 3 point hitch wood chipper is great for the environment! It helps recycle tree branches and leaves into useful mulch, which can improve soil health and reduce waste. Plus, it saves you time and energy with its self-feeding design. If you’re looking to make a positive impact while keeping your yard tidy, check out our selection of wood chippers on our website!
Wrapping It Up: Your Wood Chipper Journey
So there you have it! Mastering your 3 point hitch wood chipper isn’t just about having the right gear; it’s about knowing how to use it well. Remember, it’s all about technique, keeping your machine in good shape, and planning ahead. Keep these tips in mind:
- Choose the right chipper for your tractor and needs.
- Take care of your equipment to avoid downtime.
- Learn about the materials you’re working with to chip better.
- Use modern features to your advantage.
- Use the right techniques to make your chipper last longer.
With these pointers, you’ll be turning that yard waste into mulch like a pro in no time. Happy chipping!
Frequently Asked Questions
What is a 3 point hitch wood chipper?
A 3 point hitch wood chipper is a machine that attaches to a tractor. It helps turn branches and brush into small pieces, or mulch, making yard cleanup easier.
How do I pick the right size chipper for my tractor?
Choose a chipper based on your tractor’s horsepower. For example, a 25″ rotor works well with tractors that have up to 40 HP.
How often should I check the chipper blades?
You should check the blades every 25 to 30 hours of use. They may need sharpening or replacing after 50 to 60 hours.
Can I use the chipper for wet branches?
Yes, you can chip wet branches, but it may use more power and require more maintenance.
What are some safety tips for using a wood chipper?
Always wear protective gear like gloves and goggles. Make sure to read the safety manual and understand emergency stop features.
How do I maintain my wood chipper?
Regularly clean it, check for wear on the blades, and follow the manufacturer’s maintenance schedule.
What types of wood can I chip?
You can chip various types of wood, but it’s best to start with softer branches before moving to harder ones.
Are there any attachments I can use with my chipper?
Yes, there are several attachments available that can enhance the chipper’s functionality, like different chutes and hoppers.