

This step-by-step guide will help you properly maintain and store your drill bits set to prolong their lifespan and maintain their performance. By following these instructions, you can ensure that your drill bits remain sharp, rust-free, and ready for use whenever you need them.


Inspecting the Drill Bits
Check each drill bit thoroughly for signs of wear, damage, or dullness. Inspect the cutting edges and the overall condition of the bit. If you notice any visible wear, chips, or blunt areas, it’s time to replace the drill bit to ensure efficient drilling performance. Clean all debris and material buildup from the bits using a brush or a cloth before each use. Remove any dirt, dust, or metal shavings that could affect the precision and effectiveness of the drill bits. Make sure to clean both the tip and the flutes of the bit to maintain optimal cutting performance and prolong the lifespan of your drill bits.
Cleaning the Drill Bits
Use a mild solvent or cleaning solution to remove any stubborn residue on the drill bits. For example, soak the drill bits in a mixture of warm water and mild dish soap for 10-15 minutes, then use a soft brush to scrub away any remaining residue. Dry the bits thoroughly before moving to the next step. For instance, you can use a clean towel to wipe down each bit and ensure there is no moisture left on the surface. It is important to completely dry the bits to prevent rusting or damage.
Sharpening the Drill Bits
If your drill bits are dull, you can easily sharpen them using a drill bit sharpener or a sharpening stone. Follow these steps to get your drill bits back to their sharp cutting edge:
- Select the Right Tool: Choose between a drill bit sharpener or a sharpening stone based on your preference. Both tools work effectively to sharpen drill bits.
- Prepare the Drill Bit: Before sharpening, ensure the drill bit is clean of any debris or buildup. This makes the sharpening process smoother and more effective.
- Sharpening Process: If using a drill bit sharpener, place the bit in the sharpener and follow the manufacturer’s instructions. For a sharpening stone, hold the bit at the correct angle and make smooth, consistent strokes to sharpen the cutting edges evenly.
- Test the Sharpness: Once sharpened, test the drill bit on a piece of scrap material to ensure it cuts smoothly and efficiently. If needed, perform additional sharpening until you achieve the desired sharpness.
By following these steps and taking care to sharpen your drill bits properly, you can maintain their cutting efficiency and prolong their lifespan.
Applying Rust Protection
- Apply a thin coat of rust protection oil or silicone-based lubricant to the drill bits.
- Ensure thorough coverage on the entire surface area of the drill bits, including the flutes and shanks.
- Use a clean cloth or applicator to spread the oil evenly, avoiding excessive buildup.
- Wipe off any excess oil using a dry cloth to prevent drips or pooling.
- Store the drill bits in a dry, cool place after oil application for complete protection.
- Regularly inspect the drill bits for any signs of rust and reapply rust protection as needed.
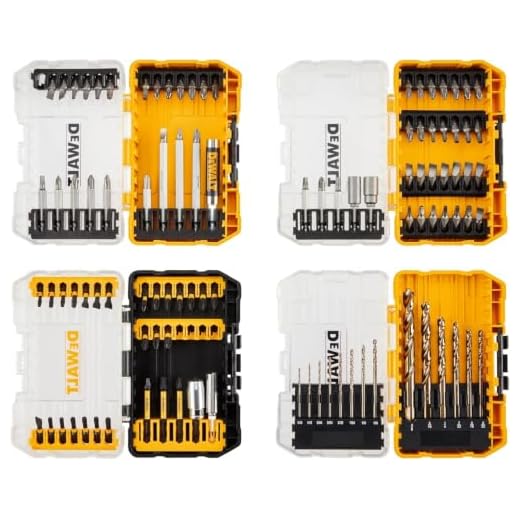
Organizing and Storing the Drill Bits
Store the drill bits in a designated case or organizer to keep them organized and prevent them from getting damaged or lost. Create separate compartments for each size of drill bit to make it easier to locate the right one when you need it. Make sure the case or organizer has a secure closure to keep the drill bits in place during storage and transport. Consider labeling each compartment with the corresponding drill bit size for quick identification. Store the case or organizer in a dry, cool place away from direct sunlight or extreme temperatures to preserve the quality of the drill bits for longer. Regularly inspect the drill bits for any signs of wear or damage, and replace them as needed to ensure optimal performance.
Regular Maintenance Routine
To create a regular maintenance schedule for your drill bits set, follow these steps:
- Check Your Drill Bits Regularly: Start by inspecting your drill bits after each use. Look for any signs of dullness, wear, or damage.
- Clean Your Drill Bits: Remove any debris or buildup from the bits using a wire brush or a cleaner specifically designed for drill bits. This helps prevent them from getting clogged and ensures better performance.
- Sharpen Your Drill Bits: Use a sharpening tool to keep the bits sharp and effective. You can use a bench grinder or a specialized bit sharpening tool for this purpose.
- Maintain a Log: Keep a log of when you last checked, cleaned, and sharpened each bit. This will help you stay organized and ensure you don’t miss any maintenance tasks.
By creating a routine to check, clean, and sharpen your drill bits, you can prolong their lifespan and ensure they are always in optimal condition for your next project.
Drill Bit Care Tips
In conclusion, by following the tips outlined in this guide on how to maintain and store your drill bits set, you can ensure they remain sharp and efficient for longer. Proper maintenance, such as regular cleaning and lubricating, coupled with storing them in a dry and organized manner, will extend the life of your drill bits and save you time and money in the long run. Remember, a little care now can lead to big benefits later on. Happy drilling!
Essential Equipment Needed
Drill Bit Care Essentials
Getting the Most Out of Your Drill Bits Set
- Start by selecting the right drill bit size for the material you are working with (wood, metal, plastic, etc.). Check the packaging or manufacturer’s recommendations for guidance
- Securely tighten the drill bit into the chuck of your drill. Make sure it is centered properly to avoid wobbling during use
- Apply firm and steady pressure while drilling. Let the drill bit do the work without forcing it, to prevent overheating or breaking
- Use the appropriate speed setting on your drill based on the material and type of drill bit you are using. Higher speeds are generally used for harder materials like metal, while lower speeds are suitable for softer materials like wood
- After use, clean your drill bits to remove any debris or buildup that could affect their performance. Store them in a secure place to prevent damage and ensure they remain sharp for future use
Answering Your Drill Bit Set Questions
Yes, the drill bits in the set can be used for woodworking, metalworking, and general household tasks. They are versatile and designed to handle various materials and projects. Just make sure to use the appropriate drill bit size and type for the specific task you are working on to achieve the best results. Enjoy your projects!


Thank you for your feedback! Adding a section on selecting the appropriate drill bits for various materials is a great idea. We will consider including that in future revisions of the guide.
I found the guide very informative and easy to follow. I would love to see a section on how to choose the right drill bits for different materials or projects. It would be helpful to know which bits are best for wood, metal, or masonry.
After following the steps in this guide, I noticed a significant improvement in the performance of my drill bits. It would be beneficial to have a section on troubleshooting common issues with drill bits, such as wobbling or overheating.
We’re glad to hear about your positive experience! Including a troubleshooting section is a great suggestion to address common drill bit issues. We will work on incorporating that into the guide to provide more comprehensive maintenance tips.
I have a different method for storing my drill bits using a magnetic strip on the wall. It keeps them organized and easily accessible. It might be a useful alternative storage option to mention in the guide.
Thank you for sharing your storage method! Using a magnetic strip is a clever way to store drill bits. We appreciate your suggestion and will consider adding it as an alternative storage solution in the guide for readers to choose from.