

Yo, concrete warriors! Ready to level up your mixing game? Let’s dive into the nitty-gritty of how to assemble and disassemble a cement mixer without losing your cool.
Ever felt like your mixer’s got a mind of its own? You’re not alone.
Most DIY heroes and construction pros have wrestled with these beasts at some point. But fear not – I’m about to spill the secrets that’ll make you the master of your mixer.


Why Should You Care About Assembly and Disassembly?
Look, here’s the deal:
- Knowing your mixer inside out saves you time and cash
- You’ll avoid rookie mistakes that could trash your projects
- Maintenance becomes a breeze, not a headache
- You’ll work safer and smarter (your back will thank you)
- Troubleshooting becomes second nature
- You’ll impress your crew with your mixer mastery
So, let’s get our hands dirty and break this down, step by step.
Setting Up Shop: The Prep Work
First things first – you gotta set the stage right.
Choose Your Battlefield
Pick a spot that’s flatter than a pancake. Uneven ground? That’s a recipe for disaster.
Gather Your Gear
Round up all your tools and parts. Nothing kills momentum like running around for a missing bolt.
Pro Tip: Lay everything out like you’re prepping for surgery. It’ll save you headaches later.
Necessary Equipment Checklist
The Assembly Game: Putting It All Together
Frame It Up
Start with the frame – it’s the backbone of your operation.
- Line up those frame pieces like a pro
- Bolt ’em tight, but don’t go Hulk on them
- Double-check for any wonky parts
Frame Assembly Tips:
- Start with the base and work your way up
- Use a level to ensure everything’s straight
- Tighten bolts in a star pattern for even pressure
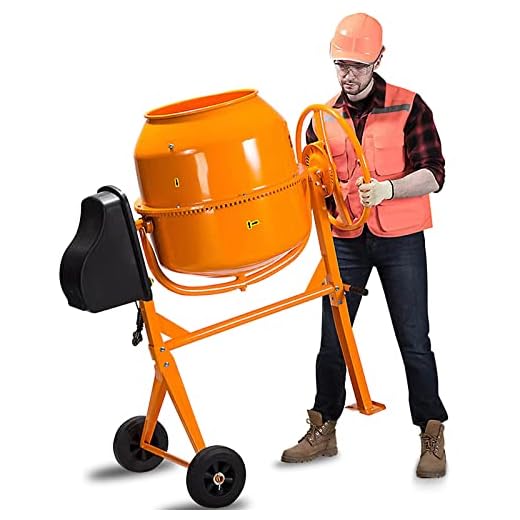
Drum Roll, Please
Now for the main event – attaching the drum.
- Lift with your legs, not your back (seriously, don’t be a hero)
- Line it up just right on the frame
- Secure that bad boy – loose drums are bad news
Drum Attachment Hacks:
- Use a buddy system if the drum’s heavy
- Grease the drum bearings before attaching
- Check the drum seals for wear – replace if needed

Powering Up: Motor Time
Here’s where things get juicy:
- Mount that motor like you mean it
- Wire it up (get this wrong, and you’re in for a shock – literally)
- Triple-check your connections – safety first, folks
Motor Mounting Mastery:
- Ensure proper alignment with the drum
- Use lock washers to prevent loosening from vibration
- Check belt tension (if applicable) – not too tight, not too loose
Handles and Wheels: The Final Touch
Slap on those handles – they’re your mixer’s love handles
Wheel it in – make sure they’re tight and roll smooth
Handle and Wheel Wisdom:
- Grease wheel bearings for smooth rolling
- Test handle stability – wobbly handles are accidents waiting to happen
- Consider upgrading to pneumatic tires for rough terrain
Assembling a cement mixer isn’t rocket science, but it ain’t child’s play either. Take your time, do it right.
")
The Disassembly Dance: Taking It Apart
When it’s time to break it down, just reverse the process. But here’s the kicker – pay attention as you go. It’ll make reassembly a breeze.
- Power down and unplug (safety first, remember?)
- Remove the drum – careful, it’s heavier than it looks
- Disconnect the motor – keep those wires labeled
- Take off the wheels and handles
- Break down the frame
Disassembly Pro Tips:
- Take photos as you go – future you will thank present you
- Use plastic bags to store small parts – label them!
- Clean components as you disassemble – it’s easier now than later
Disassembling a cement mixer is like solving a puzzle in reverse. Stay organized, and you’ll thank yourself later.
Maintenance Musts: Keep Your Mixer Purring
Listen up – a little TLC goes a long way:
- Clean that drum after every use (dried concrete is your enemy)
- Grease moving parts regularly
- Check for wear and tear – catch issues early
Maintenance Schedule:
- Daily: Quick clean and visual inspection
- Weekly: Thorough cleaning, lubrication check
- Monthly: Detailed inspection of all components
- Quarterly: Belt replacement (if needed), bearing check
Safety First, Always
Don’t be the guy who learns the hard way:
- Keep loose clothes and long hair in check – getting caught in machinery sucks
- Wear those safety goggles – your eyes are kinda important
- Gloves are your friends – cement burns are no joke

Assembly Efficiency Tips
Safety Gear Checklist
Troubleshooting 101: When Things Go Sideways
Even the pros hit snags. Here’s how to roll with the punches:
- Mixer won’t start? Check the power and connections
- Weird noises? Tighten everything up
- Uneven mixing? Your drum might be off-kilter
Common Issues and Quick Fixes:
- Motor overheating: Check for obstructions, ensure proper ventilation
- Drum not rotating: Inspect belt/chain, check for jams
- Leaking drum: Replace seals, check for cracks
- Excessive vibration: Balance the load, check for loose parts
Pro Tip: Keep a logbook of issues and fixes. It’s like a cheat sheet for future you.
Mixing Magic: Getting the Most from Your Machine
Now that you’re a pro at assembly and disassembly, let’s talk mixing:
- Start with water, then add dry materials
- Don’t overload – 2/3 full is the sweet spot
- Mix for 3-5 minutes for the perfect consistency
Mixing Ratios for Common Projects:
- Standard concrete: 1 part cement, 2 parts sand, 3 parts gravel
- High-strength concrete: 1 part cement, 1 part sand, 2 parts gravel
- Mortar: 1 part cement, 3 parts sand

The Environmental Angle: Mixing Responsibly
Let’s get real for a sec – we gotta think about Mother Earth:
- Dispose of waste properly – no dumping in storm drains
- Consider eco-friendly mixers – they exist, and they’re awesome
- Optimize your mix ratios to reduce waste
Eco-Friendly Mixing Tips:
- Use recycled aggregates when possible
- Explore low-carbon cement alternatives
- Implement water recycling systems on-site
Choosing the Right Mixer for Your Needs
Not all mixers are created equal. Here’s a quick rundown:
- Drum Mixers: Your classic workhorse
- Pan Mixers: Great for smaller, specialized jobs
- Continuous Mixers: Ideal for high-volume work
- Reversing Drum Mixers: For thorough mixing of tough materials
Consider factors like job size, frequency of use, and portability when picking your mixer.
The Final Mix: Wrapping It Up
Alright, concrete commandos, let’s recap:
- Assembling and disassembling a cement mixer isn’t just about brute force
- It’s a skill – one that’ll save you time, money, and headaches
- Respect the process, respect the machine
- Safety isn’t just a buzzword – it’s your ticket to a long, productive career
- Regular maintenance is key to longevity
- Choose the right mixer for your needs
- Think green – our industry can make a difference
Remember, in the world of concrete, you’re only as good as your last mix. Master your mixer, and you’ll be the king of the jobsite.
Now go forth and mix with confidence. Your projects (and your back) will thank you.
Keep it real, keep it safe, and keep on mixing!
Cement Mixer FAQs: The Stuff You’re Too Afraid to Ask
Depends on usage, but generally, check critical parts every 6 months.
Yep, but clean it thoroughly between uses. Cross-contamination is a real buzzkill.
Can be, but inspect it like a detective. One person’s trash isn’t always another’s treasure.
Clean it, grease it, cover it. Treat it like a classic car you’re putting in storage.
Proceed with caution. Unauthorized mods can void warranties and create safety hazards.
With proper maintenance, a quality mixer can last 5-10 years or more.
Check local regulations. Many parts can be recycled – don’t just dump it!


Successfully assembled the cement mixer following the guide! It was a straightforward process with clear instructions.
Could you include safety precautions in the guide for handling the cement mixer, such as wearing protective gear?
Is there a recommended maintenance schedule for the cement mixer to keep it in optimal condition?
Great question! We will add a section on recommended maintenance practices to ensure the longevity of the cement mixer.
I encountered difficulties attaching the drum. Any tips on aligning it properly to the frame?
I’m sorry to hear about the issue you faced. Make sure to align the drum with the frame markings and secure it gradually. We will update the guide with more detailed instructions on this step.
Thank you for your suggestion! Safety precautions are crucial, and we will make sure to include a section on safety gear in the guide.
Assembling and disassembling a cement mixer is essential for construction projects, especially for small-scale DIY projects.
Would it be beneficial to include a troubleshooting section in the guide for common issues users might face during assembly or disassembly?
Thank you for your feedback! We will definitely incorporate a troubleshooting section to address common issues and provide solutions for a smoother assembly and disassembly process.
Sharing a personal tip: lubricating the moving parts of the cement mixer can help reduce wear and tear over time.