

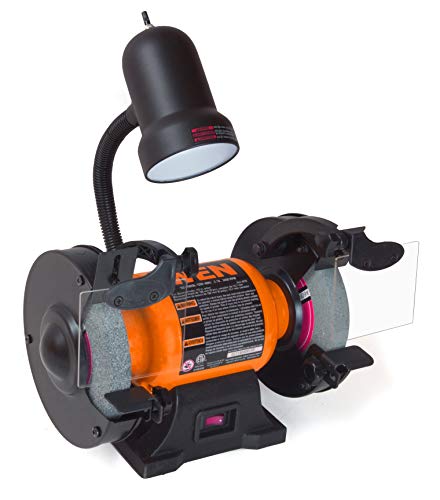
Is your bench grinder acting up? Feeling like you’re wrestling with a cranky machine every time you need to sharpen a tool?
Let’s fix that.
I’m gonna walk you through a no-BS maintenance routine that’ll keep your grinder purring like a kitten. No fluff, no jargon – just straight talk on how to keep your workshop workhorse in top shape.


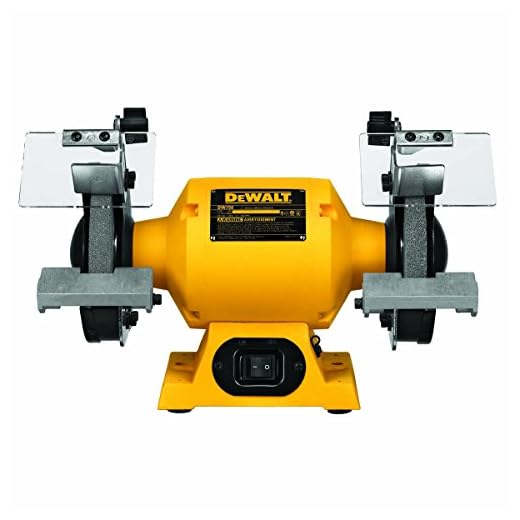
Why Your Grinder Needs TLC
Think of your bench grinder like a car. Neglect it, and you’re asking for trouble.
Regular maintenance:
- Extends its lifespan
- Keeps it running smoothly
- Prevents costly repairs
- Keeps you safe (yeah, safety matters)
A well-maintained grinder isn’t just about performance. It’s about not wasting cash on replacements or, worse, a trip to the ER.
Here’s the deal: a bench grinder is a powerhouse in your workshop. It’s sharpening your chisels, smoothing out rough edges, and maybe even helping you reshape metal. But all that power comes with responsibility. Ignore it, and you’re basically throwing money down the drain.
The Nuts and Bolts of Grinder Maintenance
Let’s break this down into bite-sized chunks:
1. Keep It Clean
Dirt is your grinder’s enemy. After each use:
- Brush off dust and metal shavings
- Wipe down the exterior
- Clean the wheel guards
Pro tip: Use compressed air to blast out hard-to-reach spots.
But here’s the kicker – don’t just clean the obvious parts. Get in there and really give it a once-over. That buildup of metal dust? It’s not just messy; it’s potentially dangerous. Metal particles can get into the motor, wear down bearings, and even become a fire hazard.
Take an extra minute to clean the air vents. A clogged motor is an overheating motor, and that’s a fast track to a burnt-out grinder.
2. Check the Wheels
Your grinding wheels are the heart of the machine. Treat ’em right:
- Inspect for cracks or chips before each use
- Replace if damaged (no exceptions)
- Dress the wheels to keep ’em true
Let’s dive deeper into wheel care:
The Ring Test: Before mounting a wheel, do the ring test. Hold it up by the center hole and tap it gently with a plastic screwdriver handle. A good wheel will give a clear ring. If you hear a dull thud, that wheel’s compromised. Don’t use it.
Proper Storage: Store your wheels in a dry place. Moisture can weaken the bonding agents in the wheel. And for Pete’s sake, don’t stack heavy stuff on top of them.
Know Your Wheels: Not all wheels are created equal. Aluminum oxide is great for general-purpose grinding. Silicon carbide is your go-to for non-ferrous metals. Using the right wheel for the job isn’t just about efficiency; it’s about safety.
3. Lubricate Moving Parts
A little oil goes a long way:
- Hit the bearings with machine oil every few months
- Don’t overdo it – a few drops’ll do
- Wipe off excess to avoid attracting dust
Here’s the thing about lubrication – it’s not just about reducing friction. It’s about preventing rust, reducing wear, and keeping your grinder running cooler. But remember, more isn’t always better.
Overlubrication is a rookie mistake. Too much oil attracts dust and grit, turning into a nasty abrasive paste that’ll wear out your bearings faster than you can say “oops.”
4. Tighten Everything Up
Vibration loosens things over time:
- Check all nuts, bolts, and screws monthly
- Tighten anything that’s loose
- Pay special attention to wheel guards and tool rests
Here’s a maintenance hack for you: create a checklist of all the bolts and screws on your grinder. Go through it methodically each month. It might seem like overkill, but trust me, it’s worth it.
A loose bolt can turn into a projectile real quick when you’re dealing with a machine spinning at 3,450 RPM. That’s not just dangerous; it’s potentially lethal.
5. Align the Tool Rests
Proper alignment = safer grinding:
- Keep tool rests within 1/8 inch of the wheel
- Adjust as the wheel wears down
- Ensure they’re square to the wheel face
Let’s talk about that 1/8 inch gap. It’s not arbitrary. It’s the sweet spot between being close enough for control and far enough to prevent jams. Any wider, and you risk your workpiece getting sucked in between the rest and the wheel. Not fun.
And squareness matters. A tool rest that’s off-square will give you beveled edges when you’re trying for straight ones. It’s all about precision, folks.

6. Balance the Machine
A wobbly grinder is a dangerous grinder:
- Check for stability on your workbench
- Use shims if needed to level it out
- Consider bolting it down for extra security
Balancing isn’t just about safety; it’s about quality work. A grinder that’s dancing around your bench is gonna give you uneven grinds, period.
If you’re serious about your craft, consider investing in a heavy-duty stand designed for grinders. It’ll give you rock-solid stability and often comes with built-in coolant trays and work lights.
7. Electrical Safety Check
Don’t get zapped:
- Inspect cords and plugs for damage
- Check that the ground wire is intact
- Test the on/off switch for snappy response
Electricity and metal shavings are a match made in hell. One compromised wire, and your grinder becomes a shock hazard. Don’t mess around with electrical issues. If you’re not 100% sure about the wiring, get a pro to look at it.
8. Wheel Dressing 101
Keep those wheels sharp:
- Use a diamond dresser or dressing stick
- Go light – you’re shaping, not grinding the wheel itself
- Do this when wheels get glazed or uneven
Wheel dressing is an art form. Do it right, and you’ll extend the life of your wheels and get cleaner grinds. Do it wrong, and you’re just wasting abrasive.
When you dress a wheel, you’re not just cleaning it. You’re re-exposing sharp abrasive grains and ensuring the wheel face is true. It’s like giving your grinder a fresh edge every time.
Technique Matters: Move the dresser smoothly across the face of the wheel. Jerky movements will leave uneven surfaces. And always dress the wheel when it’s running at full speed – it ensures an even result.
9. Know When to Replace
Everything has a lifespan:
- Replace wheels when they’re worn down to 2/3 original diameter
- Swap out bearings if they start making noise
- Don’t try to squeeze life out of worn parts – it’s not worth the risk
And don’t cheap out on replacement parts. A no-name wheel might save you a few bucks now, but it’s a false economy. Quality parts last longer and perform better.

Quick Safety Rundown
- Always wear eye protection. No exceptions.
- Use the wheel guards. They’re there for a reason.
- Don’t grind on the side of the wheel. That’s asking for trouble.
- Let the tool do the work. Don’t force it.
Let’s break this down further:
Eye Protection: We’re talking full-face shields here, not just glasses. A tiny metal shard in your eye can end your workshop days real quick.
Wheel Guards: They’re not just for show. They direct sparks and debris downward and contain wheel fragments if a wheel shatters. Don’t remove them, ever.
Side Grinding: The sides of most wheels aren’t designed for grinding. They can’t handle the lateral stress and are more likely to shatter. Stick to the front face of the wheel.
Gentle Pressure: Pushing hard doesn’t make the job go faster; it just overheats your tool and the wheel. Let the abrasives do their job.
Optimizing Your Grinder Game
Want to level up? Try these pro tips:
- Upgrade Your Wheels: Different materials need different wheels. Investing in quality wheels for specific tasks can be a game-changer.
- Add a Light: A flexible work light can make a huge difference in accuracy and reduce eye strain.
- Build a Spark Deflector: A simple sheet metal shield can keep sparks out of your face and off your clothes.
- Create a Jig System: For repetitive tasks, jigs can improve consistency and safety.
- Consider Variable Speed: If you work with a variety of materials, a variable speed grinder offers more versatility.
Let’s dive deeper into each of these:
Wheel Upgrades: Think beyond just grit levels. CBN (Cubic Boron Nitride) wheels are a game-changer for high-speed steel tools. They run cooler and last way longer than traditional wheels.
Lighting: Don’t underestimate good lighting. A LED ring light around your wheel can eliminate shadows and give you a clear view of your work. It’s not just about seeing better; it’s about working safer.
Spark Deflection: A well-designed spark deflector doesn’t just protect you; it keeps your workspace cleaner. Less time cleaning up means more time grinding.
Jig Systems: Custom jigs can transform your grinder into a precision machine. Whether you’re sharpening lathe tools or creating perfect bevels, a good jig system is worth its weight in gold.
Variable Speed: Different materials have different optimal grinding speeds. Softer metals need slower speeds to prevent overheating. A variable speed grinder lets you dial in the perfect RPM for each job.
Troubleshooting Common Issues
Grinder acting up? Here’s a quick fix guide:
- Excessive Vibration: Check wheel balance and tighten all bolts.
- Uneven Grinding: Dress the wheel and check tool rest alignment.
- Motor Overheating: Clean out dust buildup and check for bearing issues.
- Unusual Noises: Inspect for loose parts or failing bearings.
But let’s go beyond the basics:
Vibration: If tightening bolts doesn’t solve it, check for wheel runout. A wheel that’s not perfectly round will cause vibration no matter how tight your bolts are.
Uneven Grinding: Besides wheel dressing, check your technique. Uneven pressure or inconsistent movement can cause uneven wear on both your wheel and your workpiece.
Overheating: If cleaning doesn’t solve it, check your power supply. Undervoltage can cause motors to work harder and overheat.
Noises: Different noises mean different things. A high-pitched whine often indicates bearing issues. A low rumble might be a sign of an unbalanced wheel or misaligned pulleys.
The Long Game: Scheduling Your Maintenance
Stay on top of your grinder game with this schedule:
- Daily (or per use): Visual inspection, quick clean-up
- Weekly: Thorough cleaning, wheel dressing if needed
- Monthly: Bolt tightening, alignment checks
- Quarterly: Lubrication, electrical safety check
- Annually: Comprehensive inspection, replace worn parts
Here’s how to make this schedule work for you:
Make it a habit. The more routine this becomes, the less it feels like a chore.
Set reminders on your phone or workshop calendar.
Keep a maintenance log. Track what you’ve done and when.
Combine maintenance with use. Just finished a big project? That’s the perfect time for a thorough check-up.
The Bottom Line
A well-maintained bench grinder isn’t just a tool – it’s a workshop MVP. It’ll save you time, money, and headaches in the long run.
Remember:
- Clean it regularly
- Check it often
- Replace parts when needed
- Work smart and safe
Do this, and your grinder will be your trusty sidekick for years to come.
Think of it this way: every minute you spend on maintenance saves you hours of frustration and potentially hundreds of dollars down the line. It’s not just about keeping your grinder running; it’s about respecting your craft and your safety.
A well-maintained grinder is a joy to use. It’s the difference between dreading a sharpening job and looking forward to it. It’s about having confidence in your tools and, by extension, in your work.
So don’t slack on this. Make maintenance a part of your workflow. Treat your grinder right, and it’ll return the favor tenfold.
Now get out there and make some sparks fly (safely, of course). Your future self will thank you for taking care of your tools today.
Remember, in the workshop as in life, you get out what you put in. Invest in your tools, invest in your skills, and watch your craftsmanship soar.
Maintenance Routine for Your Bench Grinder isn’t just a chore – it’s a crucial part of your journey as a craftsman. Embrace it, master it, and let your well-tuned grinder be the foundation of your workshop success.
Bench Grinder FAQs: The Stuff You’re Too Afraid to Ask
Depends on use, but generally when they’re worn to 2/3 original diameter or show signs of damage.
It’s not ideal. Wood can clog the wheel. Stick to sandpaper or dedicated wood grinders.
Some sparking is normal with metal, but excessive sparking might mean your wheel needs dressing or replacing.
If it bogs down during normal use, you might need more horsepower. Most home shops are fine with 1/2 to 3/4 HP.
Yes, but be careful to maintain the original angle and don’t overheat the blade.
Let’s expand on these a bit:
Wheel Replacement: Don’t just go by diameter. Look for glazing, uneven wear, or any signs of cracking. A damaged wheel is dangerous at any size.
Wood Grinding: While it’s possible, it’s not recommended. The heat from grinding can burn the wood, and wood dust is more flammable than metal dust. If you must, use a very coarse wheel and light pressure.
Sparking: The type of metal matters. Ferrous metals will spark more than non-ferrous. But if you’re seeing a shower of sparks, something’s not right. Check your wheel and your technique.
Grinder Power: Consider the types of jobs you do. For occasional tool sharpening, a 1/3 HP motor is fine. For heavy-duty work or frequent use, go for 3/4 HP or higher.
Lawn Mower Blades: It’s doable, but there’s a technique to it. Use a light touch to avoid overheating, which can ruin the blade’s temper. Consider using a blade balancer after sharpening to ensure even cutting.




Thanks for the thorough guide! I feel more confident in maintaining my bench grinder now.
Great tips on extending the lifespan of my bench grinder. Will definitely implement these practices.
Do you have any recommendations for specific brands of grinder maintenance products?
The safety tips provided are crucial. Safety should always be a top priority when using power tools.
I didn’t realize how often I should be inspecting my grinder. Thanks for the reminder!
I’ve had issues with my grinder lately. This article shed some light on what I might be doing wrong.
Any advice on troubleshooting common bench grinder problems would be a great addition to this article.
I appreciate the detailed breakdown of the maintenance steps. It makes it easier to follow.
I would love to see a video tutorial accompanying this article to visualize the maintenance steps better.
Very informative article! I never knew how important maintenance was for a bench grinder.